Controlling Windows 11 Registry Editor Accessibility

Controlling Windows 11 Registry Editor Accessibility
Although the Registry Editor on Windows makes it easy for administrators to access critical settings and configurations, making incorrect changes to registry files can cause the system to become unstable and compromise its security. This is a common concern among Windows users who share their computers with others.
Fortunately, it’s possible to disable (or enable) Registry Editor access on your Windows 11 PC. Let’s see how.
Disclaimer: This post includes affiliate links
If you click on a link and make a purchase, I may receive a commission at no extra cost to you.
1. How to Disable or Enable Registry Editor Access via the Group Policy Editor
The most straightforward way to block access to the Registry Editor on Windows is via the Group Policy Editor. However, it’s important to note that this tool is only available on Windows Pro, Education, and Enterprise editions. If you happen to be using Windows Home, refer to our guide on how to access the Group Policy Editor on Windows Home before proceeding.
- Press Win + R to open the Run dialog box.
- Type gpedit.msc in the box and press Enter.
- In the Local Group Policy Editor window, use the left pane to navigate to User Configuration > Administrative Templates > System.
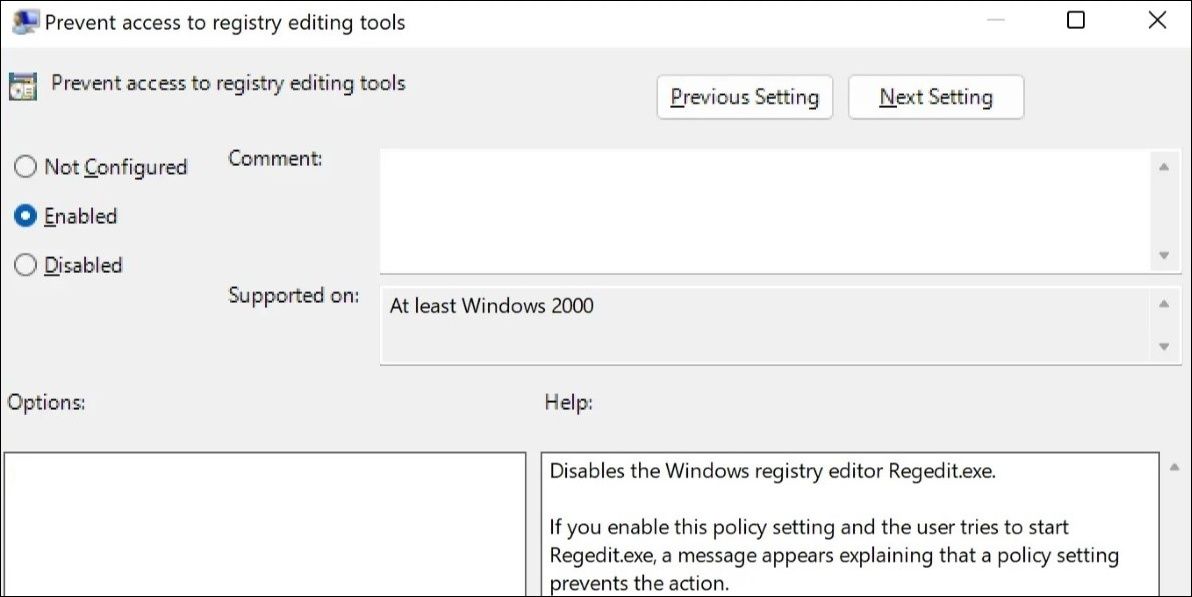
- Double-click the Prevent access to registry editing tools policy in the right pane.
- Select the Enabled option.
- Click Apply followed by OK.

Following this, users will see the “Registry editing has been disabled by your administrator” message when they attempt to access the Registry Editor. If you want to re-enable Registry Editor later, repeat the above steps and set the Prevent access to registry editing tools policy to Not configured or Disabled.
2. How to Disable or Enable Registry Editor Access via the Registry Editor
Another way to restrict the Registry Editor access on Windows involves using the Registry Editor itself. Here are the steps you can follow.
- Click the search icon on the taskbar to access the search menu.
- Type regedit in the box and press Enter.
- Select Yes when the User Account Control (UAC) prompt appears.
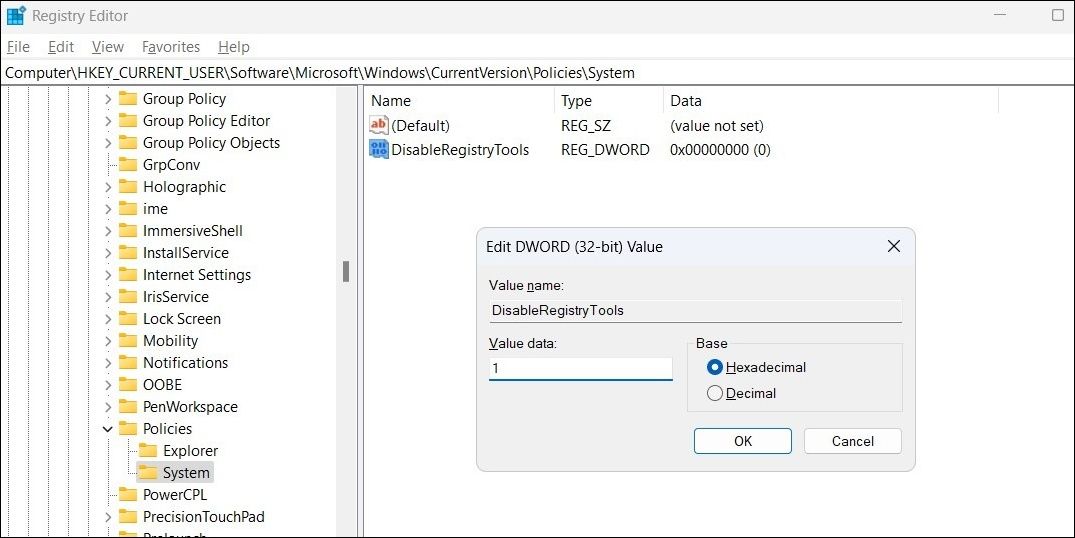
- In the Registry Editor window, use the left pane to navigate to HKEY_CURRENT_USER > SOFTWARE > Microsoft > Windows > CurrentVersion > Policies.
- Right-click on the Policies key and select New > Key. Name it System.
- Right-click on the System key and select New > DWORD (32-bit) Value. Name it DisableRegistryTools.
- Double-click the newly created DWORD, type 1 in the Value data field, and hit OK.

Once you complete the above steps, the Registry Editor will be disabled on your PC.
Although you cannot access the Registry Editor to reverse the above changes, it’s still possible to re-enable Registry Editor access. For that, you will have to create and run a REG file . Here’s how you can go about it.
Press Win + S to open the search menu.
Type notepad in the search box and press Enter.
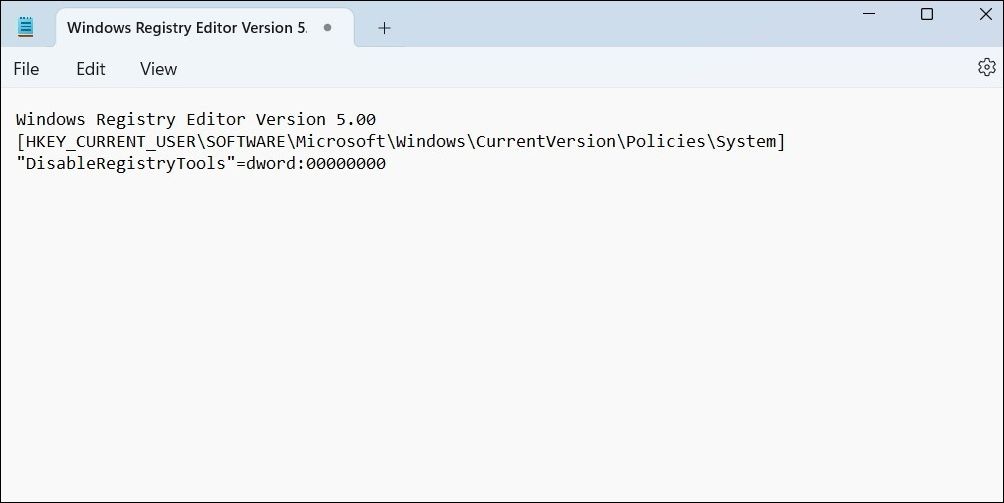
In the notepad window, paste the following command.
Windows Registry Editor Version 5.00 [HKEY_CURRENT_USER\SOFTWARE\Microsoft\Windows\CurrentVersion\Policies\System] "DisableRegistryTools"=dword:00000000
Click the File menu and select Save as.
Select Desktop in the Save as dialog box.
Enter a suitable name followed by “.reg” and hit Save. For instance, you could name the file ReEnableRegistry.reg or something similar.
Use one of the many ways to open the Command Prompt with admin rights .
Type the following command in the console and hit Enter. Make sure you replace the [username] in the following command with your actual username.
cd C:\Users\[username]\DesktopPaste the following command, replace FileName with the actual name of the REG file, and press Enter.
regedit.exe /s FileName.reg
Once you run the above command, the Registry Editor will become accessible again.
Allowing or Disallowing Registry Editor Access on Windows
Blocking access to the Registry Editor is an effective way to protect your system from registry mishaps. Nonetheless, if you opt to re-enable access to the Registry Editor on your PC, make sure to exercise caution to avoid messing up the Windows Registry.
Fortunately, it’s possible to disable (or enable) Registry Editor access on your Windows 11 PC. Let’s see how.
Also read:
- 'Comedy Collection' A 1992 Review of The Goofys
- [Updated] In 2024, Unlock Your Creative Flow Sharing Hundreds of Photos and Vids on IG
- 2024 Approved Smart Techniques for Large Video Movement Between iPhones & Macs
- Affordable Quality: Why Apple's Sub-$100 Competitor, Beats Solo Buds, Could Dominate Headphone Market - Insights From ZDNet
- Brother HL-L2300D Driver Update: How to Get & Install New Firmware
- Enhance Your Typing Experience: Speed Up Windows Keyboard Delay
- Facebook Is Unlocking Oculus Go Root Access: What This Means for Owners
- Guide to Window 11 Custom Taskbar Sizing
- Guide: Enable Data Transfer Operations in Edge's Protective Mode, Win 11
- How To Edit Podcasts in GarageBand
- How To Remove the Two Factor Authentication On Apple iPhone 7
- How to Unlock Samsung Galaxy A54 5G Phone without Google Account?
- How to Use the Toolbar in Microsoft PC Manager on Windows 11
- Mend Freezing Clicks: Your Action Plan for Windows
- Remedying Recycle Bin Disruptions in Win 11 OS
- Steering Device Interactions From Power Save Mode
- Step-by-Step Tutorial: How to Create Audio-Visual Screenshots Using Movavi Software
- Streamlining Windows Store Issues: Address X80072F17
- Tackling Windows Woes: A Script Error Cure-All Guide
- Title: Controlling Windows 11 Registry Editor Accessibility
- Author: David
- Created at : 2025-02-28 22:02:00
- Updated at : 2025-03-04 20:48:05
- Link: https://win11.techidaily.com/controlling-windows-11-registry-editor-accessibility/
- License: This work is licensed under CC BY-NC-SA 4.0.


