Bypassing Verification: Loading Unsigned Drivers in Windows 2000/XP
Bypassing Verification: Loading Unsigned Drivers in Windows 2000/XP
Sometimes, Windows will block you from installing an unsigned driver, which is a driver you’ve downloaded elsewhere other than through a Windows Update or the device manufacturer’s website. But if you need the driver, and you know it is perfectly safe, you can turn off driver signature enforcement and let it through.
In this guide, we’re going to show you several ways to do it.
How to Disable Driver Signature Enforcement in the Startup Settings
A temporary way to disable driver signature enforcement is through Startup Settings, allowing you to install the unsigned drivers. However, the moment you restart your PC, Windows will re-enable driver signature enforcement. The unsigned drivers you’ve installed will still work, but you may not be able to install new ones.
To disable driver signature enforcement this way, you’ll have to access the Startup Settings screen . The Disable driver signature enforcement option will be the seventh one, so press F7 or 7 on your keyboard to select it.
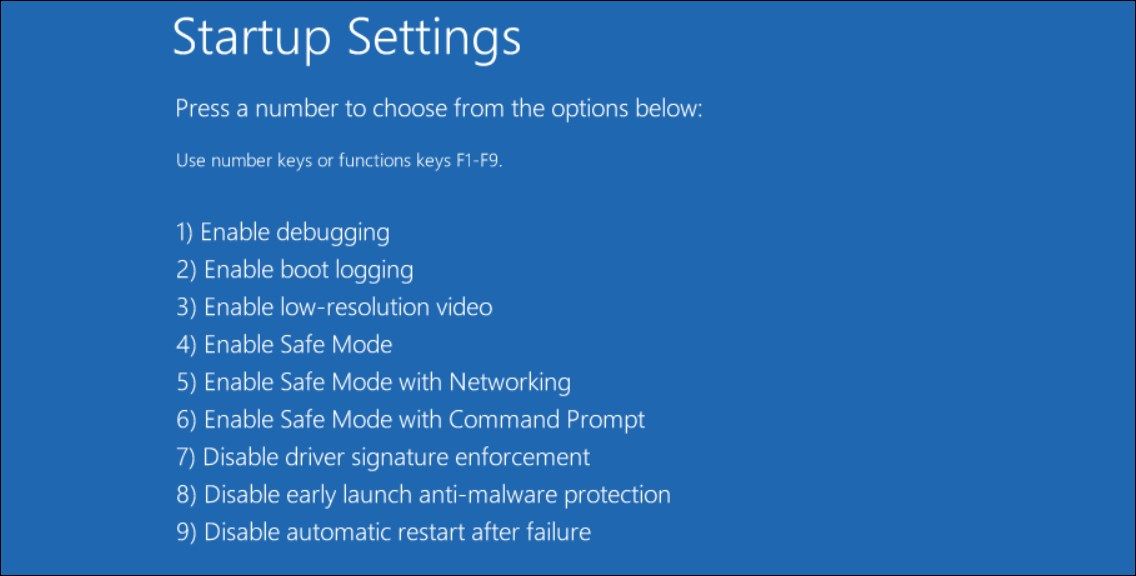
Your computer will then restart, and when it reboots, you’ll be able to install those unsigned drivers.
How to Disable Driver Signature Enforcement in the Local Group Policy Editor
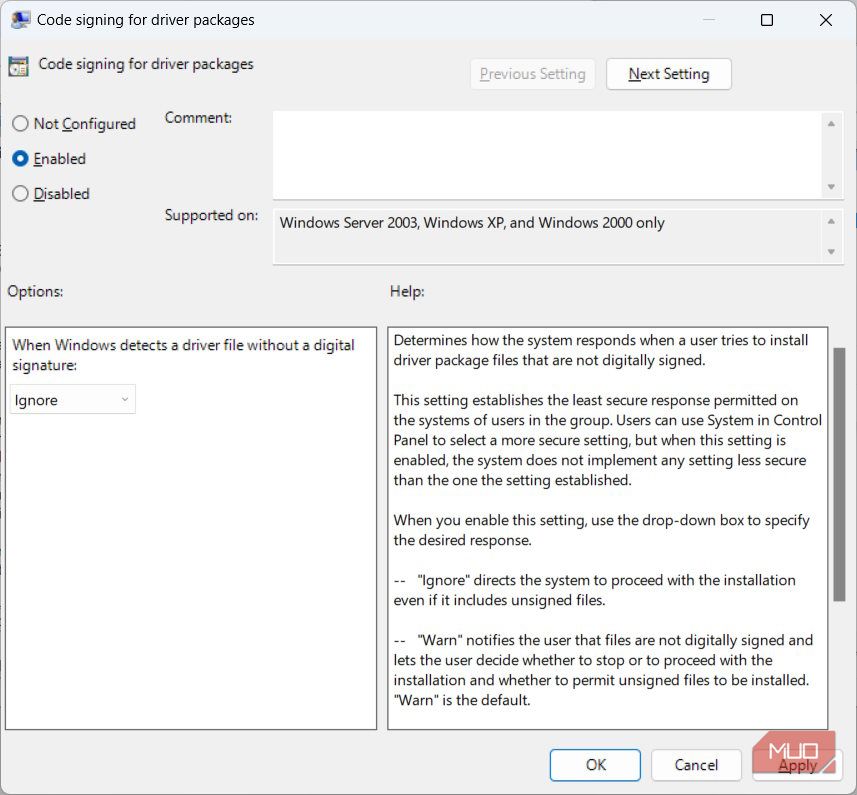
You can also disable driver signature enforcement by tweaking the Code signing for driver packages policy in the Local Group Policy Editor (LGPE). Doing this will allow you to install unsigned drivers even if you restart your computer.
Unfortunately, you can only natively access the LGPE if you’re on Windows Pro or Enterprise Edition. However, there is a way to access the LGPE on Windows Home .
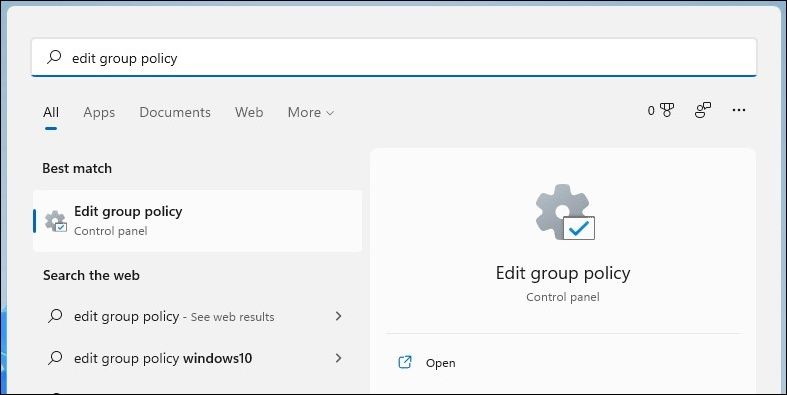
- Press Win + S to bring up Windows Search, enter group policy in the Search box, and select Edit group policy in the Search results.

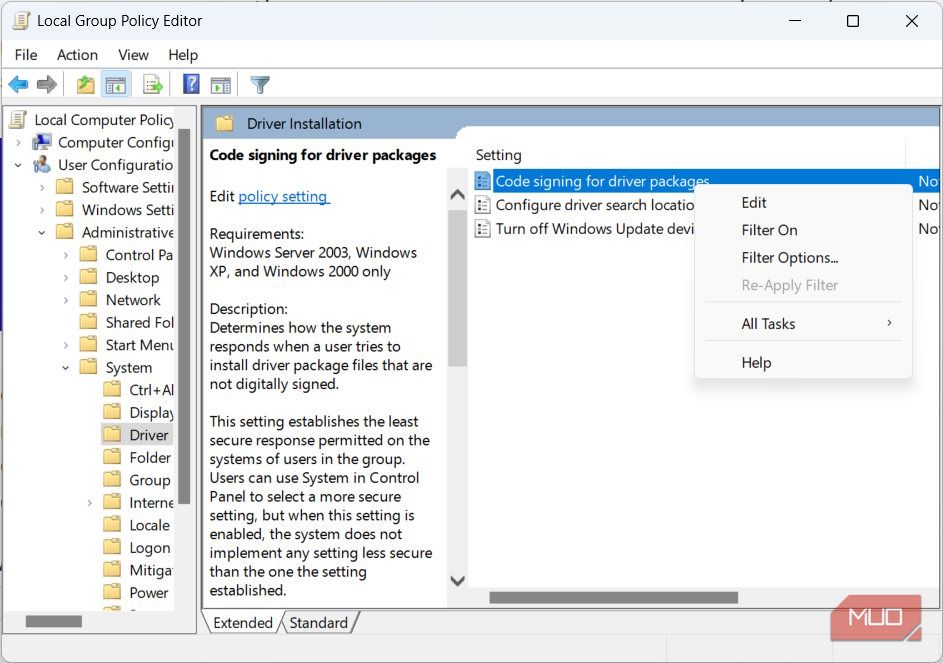
- Once the LGPE opens up, head to User Configuration > Administrative Templates > System > Driver Installation.
- Right-click Code signing for driver packages and select Edit.
- Click the Enabled radio button, and then, in the Options section, click on the dropdown and select Ignore.
- Click on OK.


If you want to enable driver signature enforcement again, go back to step #4 and set the radio button to Not configured.

company, user or members of the same household. Action! - screen and game recorder</a>
How to Disable Driver Signature Enforcement in PowerShell
Another way to disable driver signature enforcement is by running the command to turn off integrity checks in PowerShell (you’ll have to run it as an administrator). And just like with the Local Group Policy Editor, it will remain disabled until you enable it again.
Follow the steps below to turn off driver signature enforcement in PowerShell:
You can disable driver signature enforcement by opening Command Prompt as an administrator if you prefer it over PowerShell.
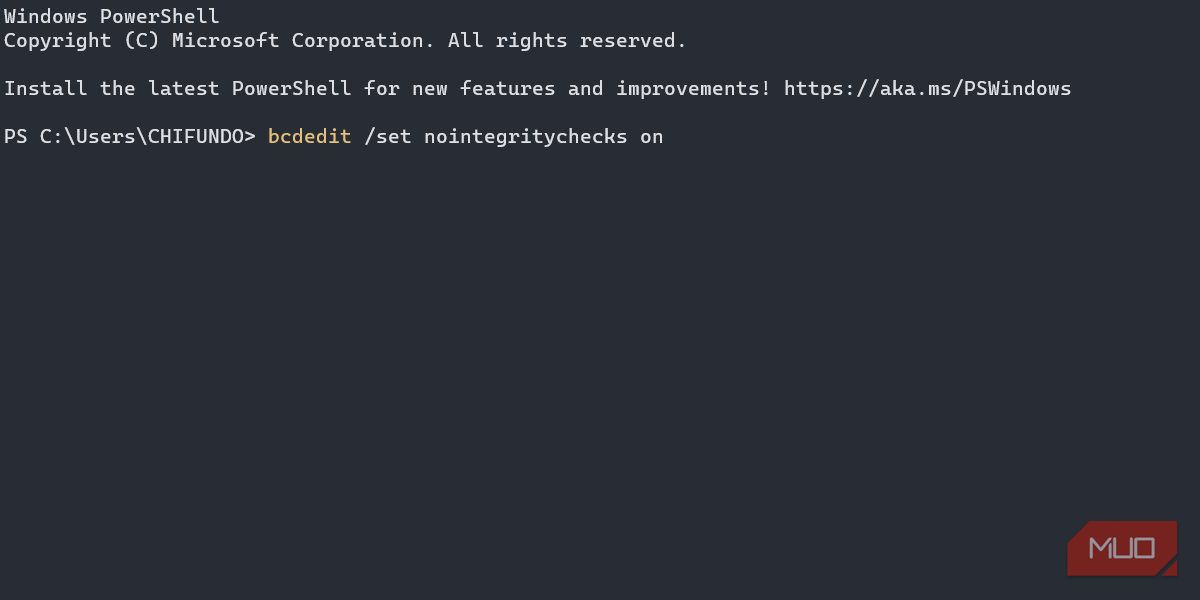
- Right-click Start and select Terminal (Admin) on Windows 11 or Windows PowerShell (Admin) on Windows 10.
- Click Yes on the UAC prompt.
- Copy bcdedit /set nointegritychecks on and paste it into PowerShell.
vMix Basic HD - Software based live production. vMix Basic HD includes 4 inputs, 3 cameras, streaming, recording, playlist.
This bundle includes Studio 200 for vMix from Virtualsetworks, HTTP Matrix 1.0 automation scheduler, and 4 introductory training videos from the Udemy vMix Basic to Amazing course. - Hit Enter to run the command.
 vMix Basic HD - Software based live production. vMix Basic HD includes 4 inputs, 3 cameras, streaming, recording, playlist.
To turn on driver signature enforcement again, replace the command in step #3 with bcdedit /set nointegritychecks off.
One potential problem you can run into when trying to turn off driver signature enforcement this way is an error stating The value is protected by Secure Boot policy and cannot be modified or deleted.
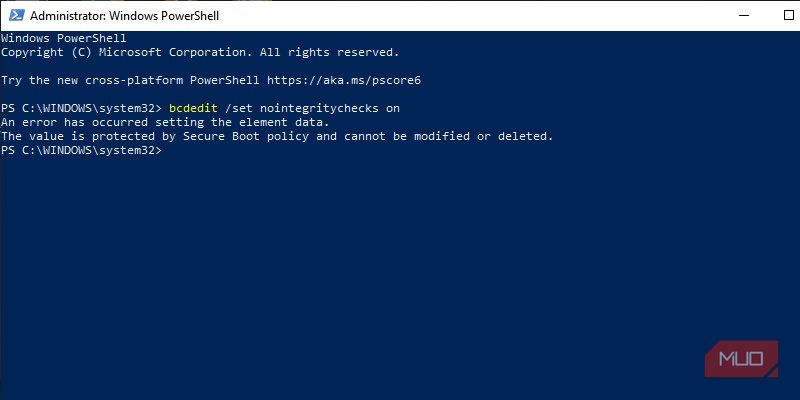
If that is the case, you can try turning off Secure Boot and trying again. But if you don’t want to do this, using Startup Settings and the Local Group Policy Editor is perfectly okay.
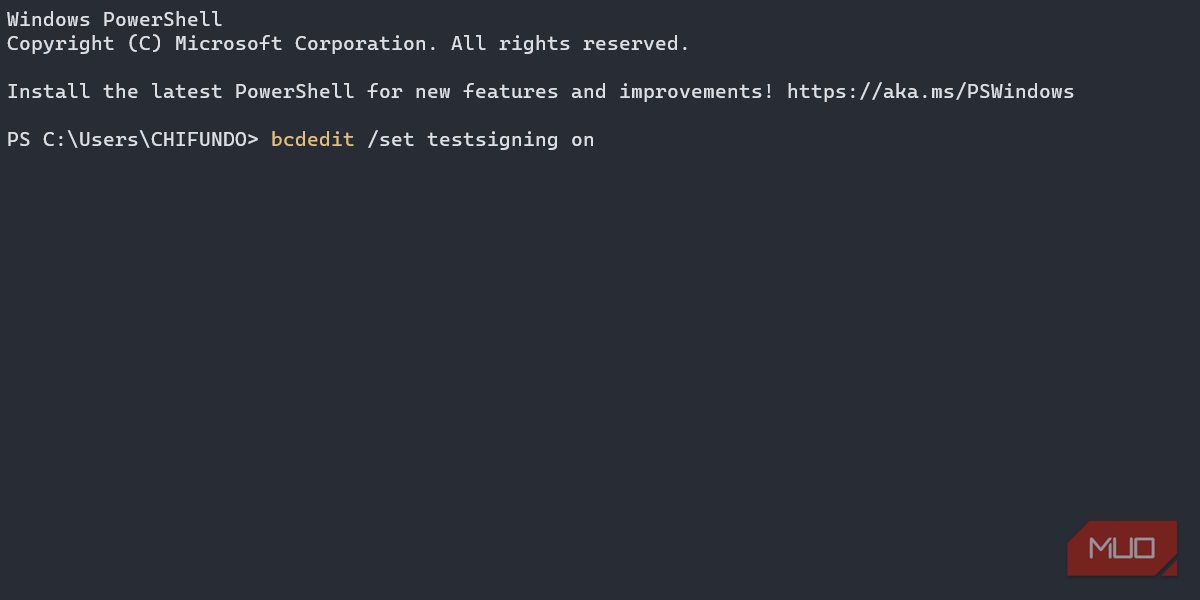
You can also put Windows in test mode, which disables driver signature enforcement, allowing you to install those unsigned drivers. To enter test mode, follow the steps below (keep in mind that you may run into the Secure Boot error):
- Right-click Start and select Terminal (Admin) on Windows 11 or Windows PowerShell (Admin) on Windows 10.
- Click Yes on the UAC prompt.
- Copy bcdedit /set testsigning on and paste it into PowerShell.
- Hit Enter to run the command.
Now restart your computer, and when it boots back up, it will be in test mode. After you’re done installing those drivers, don’t forget to disable test mode. The command to do that is bcdedit /set testsigning off.
Now You Can Install Unsigned Drivers on Windows
Installing unsigned drivers on Windows is not recommended, since they can lead to unexpected behavior. However, if you trust the driver, there’s no reason why the OS should block you from installing it. Just use one of the methods mentioned above, and you should be able to install and use unsigned drivers on your Windows PC.
In this guide, we’re going to show you several ways to do it.
- Title: Bypassing Verification: Loading Unsigned Drivers in Windows 2000/XP
- Author: David
- Created at : 2024-08-15 23:33:02
- Updated at : 2024-08-16 23:33:02
- Link: https://win11.techidaily.com/bypassing-verification-loading-unsigned-drivers-in-windows-2000xp/
- License: This work is licensed under CC BY-NC-SA 4.0.