
Bypassing Unsigned Files Error for Windows 11/10
Bypassing Unsigned Files Error for Windows 11/10
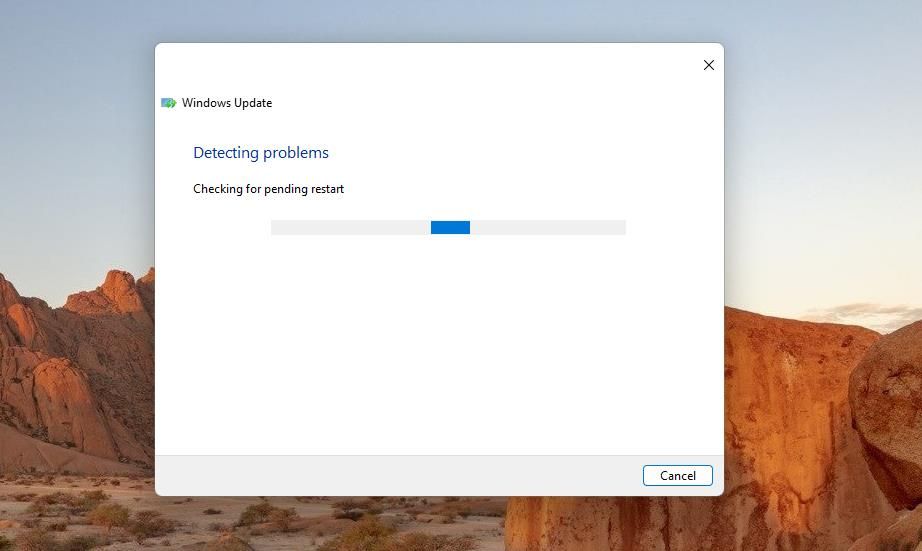
Users frequently report Windows 11/10 update errors on software support forums. One such update issue reported is an error message that says, “Some update files aren’t signed.” Some users see that error message appear within Settings’ Windows Update tab when trying to update Windows.
Windows updates fail to install when this issue occurs. This error usually includes either a 0x800b0109 or 0x800b0100 code after its message. This is how you can resolve the “Some update files aren’t signed” error 0x800b0109 on a Windows 11/10 PC.
1. Utilize the Windows Update Troubleshooter
The Windows Update troubleshooting tool is there to help you fix any issues encountered when trying to update Windows 11/10. That troubleshooter doesn’t necessarily fix every update error, but it can at least resolve some issues.
So, utilizing that troubleshooter is always worth a try, which you can access in Settings as covered within this guide to running any troubleshooter on Windows .

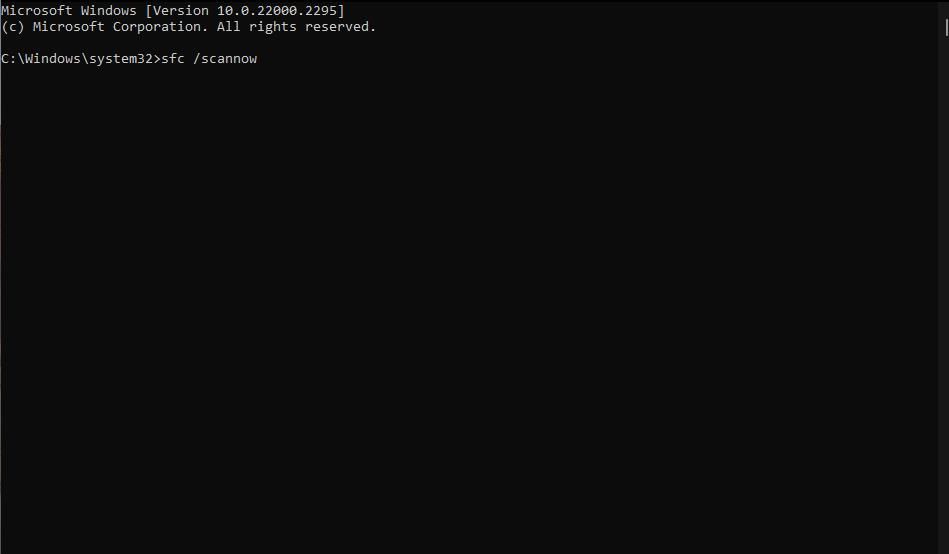
2. Run Deployment Imaging and System File Scans
System file corruption is among the most common reasons for Windows update errors . For that reason, running a System File Checker scan to address system file corruption is a recommended troubleshooting method for error 0x800b0109.
It’s also advisable to utilize the Deployment Imaging and Servicing Management to repair possible Windows image corruption.
Both Deployment Imaging and System File Checker are Command Prompt tools. You can run them by inputting and executing two commands within the Command Prompt. Our article on repairing corrupted Windows files includes instructions on how to utilize the SFC and DISM command-line tools.
3. Check the Windows Update and BITS Services Are Enabled
Windows Updates and Background Intelligent Transfer Service (BITS) are two services that need to be enabled for updates. So, check those services are correctly set like this:
- Simultaneously press the Windows logo + S keys on your keyboard.
- Enter the search phrase “services” to find the app with a matching title.
- Click on Services inside the search results.
- Double-click Windows Update to access settings for that service.

- Set the Startup type setting to the Automatic option.
- Click Start (inside the properties windows) to run the Windows Update service.
- Save the settings by pressing the Apply and OK buttons.
- Double-click the Background Intelligent Transfer Service to view its settings.
- Select a Manual startup option.
- Click the Start option for the BITS service if it’s stopped.
- Then click on the Apply and OK options to set that service’s options.

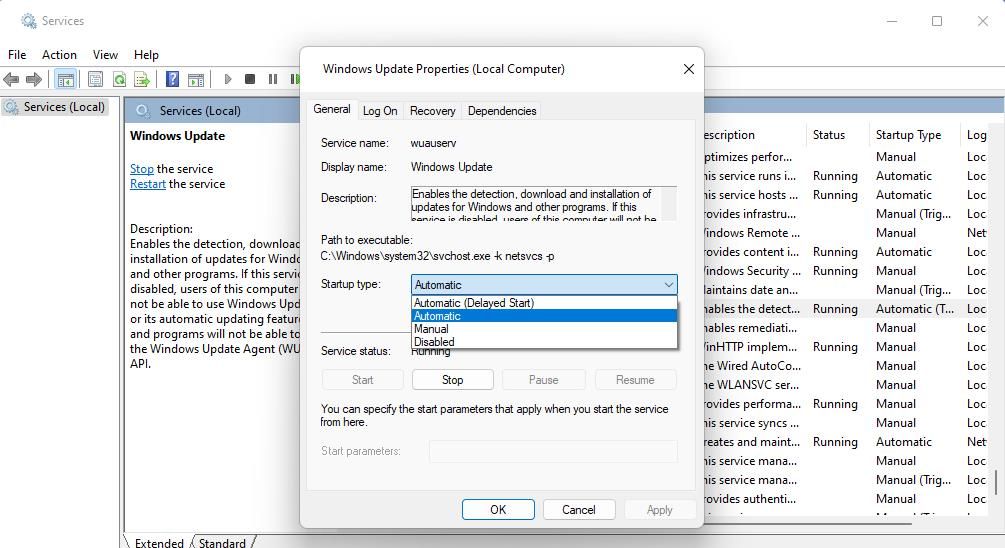
If you find both services to be already enabled and running, try restarting them. You can do so by right-clicking the BITS and Windows Update service names and selecting a Restart option on their context menus.
4. Reset Components for Windows Updates
Resetting components for Windows updates will completely refresh the catroot2 and SoftwareDistribution folders, which store update data. This troubleshooting method also reregisters all DLL files for important update services. Applying such a potential resolution can fix corrupted components causing error 0x800b0109.
To apply this possible error 0x800b0109 resolution, check out our article on resetting Windows update components . That guide includes a command-line and batch file method. Creating and running a batch file is the quicker and more straightforward way to reset Windows update components.
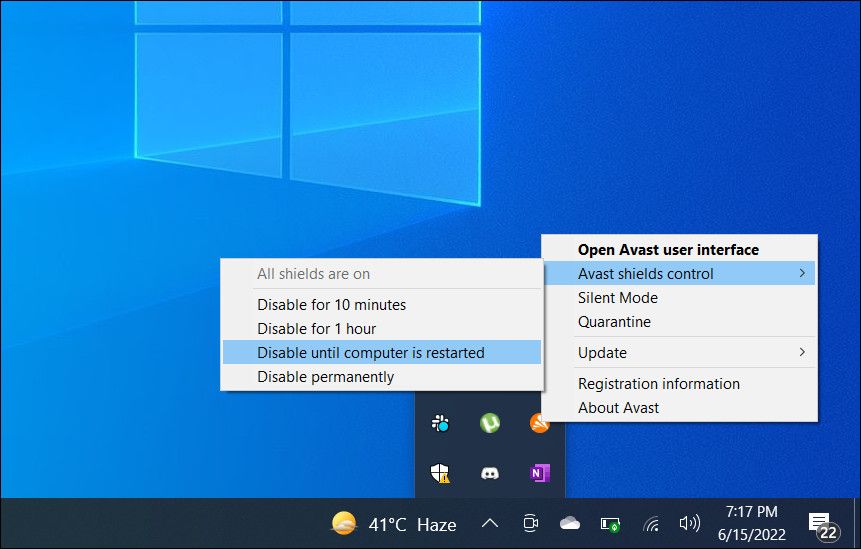
5. Deactivate Third-Party Security Software
A third-party security (antivirus) app can potentially conflict with Windows update processes. This can happen when the antivirus protection of a security app locks files needed by Windows Update. It’s not something that happens often, but temporarily disable any third-party antivirus protection on your PC just in case.
Security apps typically include options for disabling antivirus protection on their system tray context menus. Right-click your security app’s icon in Windows 11’s system tray area to find and select its option for temporarily disabling the antivirus shield. Then, return to the Settings app to see if error 0x800b0109 still happens with the antivirus shield disabled.
 Power Tools add-on for Google Sheets, 12-month subscription
6. Erase the Windows Update Key
Deleting the Windows Update registry key is a potential resolution some users confirm to fix error 0x800b0109. However, we always recommend backing up the registry or saving a system restoration point before deleting registry keys.
When you’ve done that, try deleting the Windows Update key like this:
- Open Run, accessible by pressing Windows logo key + R, and type a regedit command into that accessory.
- Select Run’s OK option to open the Registry Editor.
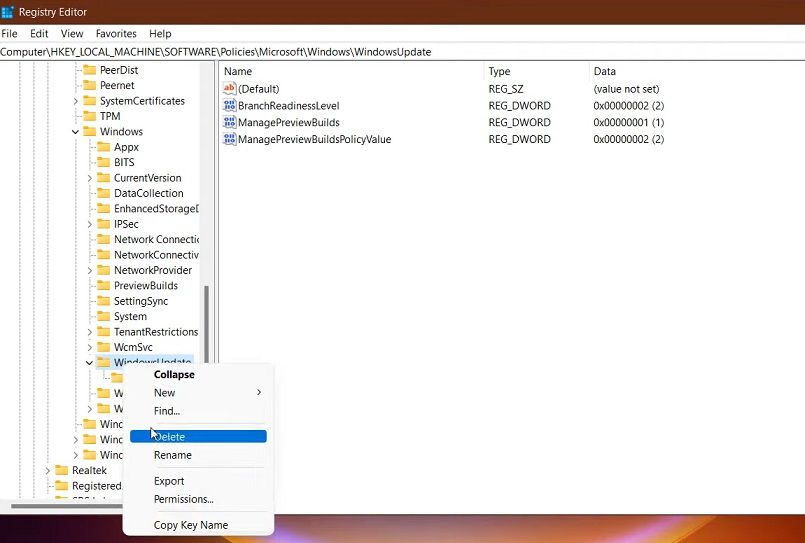
- Next, clear the registry address bar and input this key path there:
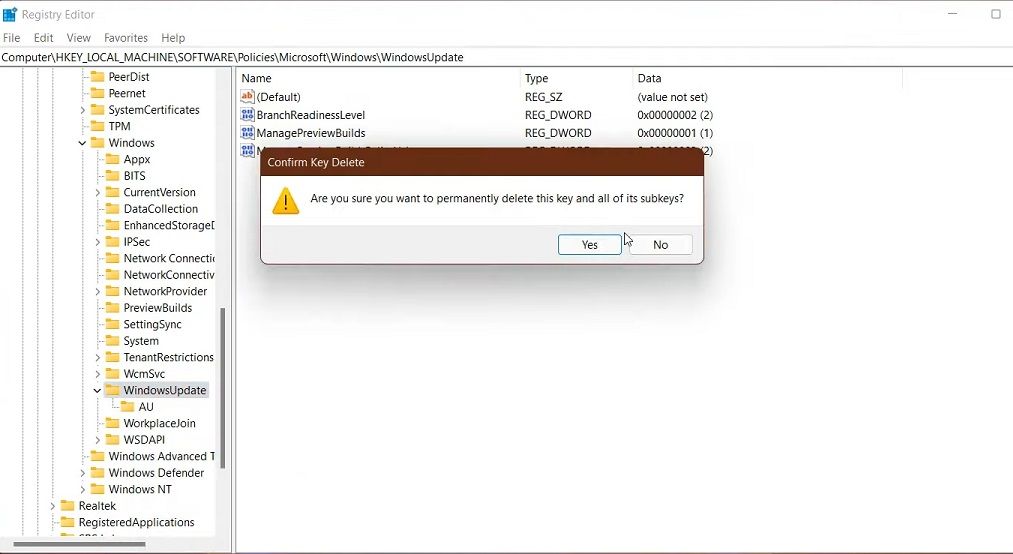
HKEY_LOCAL_MACHINE\SOFTWARE\Policies\Microsoft\Windows\WindowsUpdate - Right-click the WindowsUpdate registry key to select Delete.
- Click Yes when prompted for confirmation to delete the key.
Thereafter, it’s also recommended to restart the Windows Update and BITS services. To do so, open Services as covered in the first three steps of resolution three. Then, select the Restart context menu options for Windows Update and BITS.
7. Try Downloading the Failed Update From Microsoft Update Catalog
If error 0x800b0109 still isn’t fixed after applying the potential resolutions above, try going around it by manually downloading the affected update from Microsoft Update Catalog . Then, you can install the update with an MSU file downloaded from there.
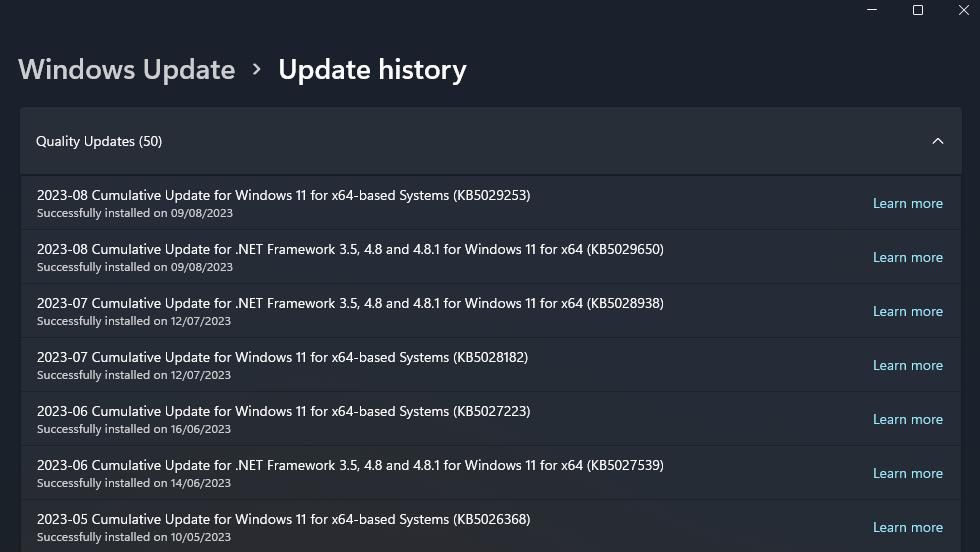
You will first need to identify what update is failing as follows:
- Simultaneously press your keyboard’s Windows logo + I keys to access Settings.
- Click Windows Update (or Update & Security) in Settings.
- Select Update history to view installed and failed updates.
- Note down the KB code for your recently failed Windows update.
Then, you can find and download that failed update on the Microsoft Update Catalog website. This article about updating Windows manually includes instructions for utilizing the Microsoft Update Catalog.

WPS Office Premium ( File Recovery, Photo Scanning, Convert PDF)–Yearly
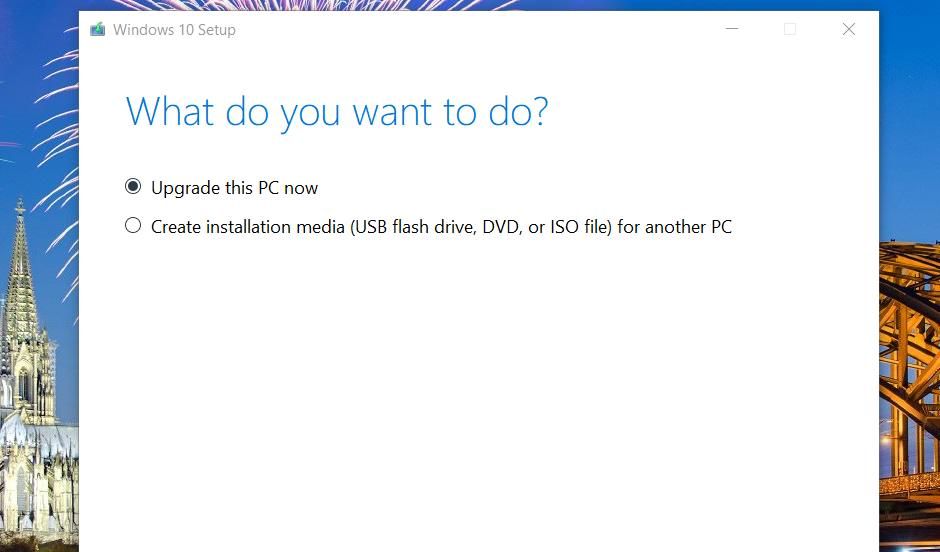
8. Apply an In-Place Windows Upgrade
An in-place Windows upgrade is the last resort for fixing error 0x800b0109. Applying this potential resolution will reinstall Windows on your PC with its latest ISO file. The installation of a fresh Windows copy will likely resolve other issues causing the 0x800b0109 update error that other potential solutions couldn’t fix.
The good thing about an in-place upgrade is that it won’t eradicate your installed software or user files. This how-to perform an in-place upgrade guide tells you how to apply this potential solution for Windows 11. The steps are quite similar for Windows 10, but you’ll need to download its ISO with the Media Creation Tool available on this Microsoft page .
Get Windows Updated Again
There isn’t a surefire way to fix error 0x800b0109 since there are varied possible reasons for that Windows 11/10 issue occurring. However, it’s likely at least one of the eight potential resolutions in this guide will fix that update issue on your PC.
Some of the best third-party Windows repair tools might also be helpful for resolving the “Some update files aren’t signed” error.
Windows updates fail to install when this issue occurs. This error usually includes either a 0x800b0109 or 0x800b0100 code after its message. This is how you can resolve the “Some update files aren’t signed” error 0x800b0109 on a Windows 11/10 PC.
- Title: Bypassing Unsigned Files Error for Windows 11/10
- Author: David
- Created at : 2024-08-16 00:04:35
- Updated at : 2024-08-17 00:04:35
- Link: https://win11.techidaily.com/bypassing-unsigned-files-error-for-windows-1110/
- License: This work is licensed under CC BY-NC-SA 4.0.