
Bring Forward Elusive Cameras in Device Management
Bring Forward Elusive Cameras in Device Management
Can’t find the camera driver in Device Manager on your device? If so, the problem could be either software-related or a camera malfunction. Don’t fret, though; it’s easy to fix. This guide will explain why the camera driver may disappear from your Device Manager and how to fix it.
Why Does the Camera Device Go Missing in Device Manager?
Here are a few major reasons why the camera device might disappear from Device Manager:
- There is a hardware issue with your device’s camera.
- The camera driver is hidden in Device Manager.
- You’ve mistakenly disabled your device’s camera.
- Your device’s camera driver has been uninstalled.
- Windows system files have become corrupt.
- The Windows operating system is unable to detect your device’s camera.
Now that you know the causes, let’s look at fixes you can apply to restore the camera driver in Device Manager.
9 Ways to Fix the Camera Driver Missing in Device Manager
If the camera driver doesn’t appear in the Device Manager, ensure it’s not hidden and that the camera isn’t disabled. If that isn’t the case, install camera drivers manually, reset the camera, run the camera troubleshooter, and run Windows built-in scans. If these fixes fail, you should manually add the hardware or reset your computer.
Now let’s see how to apply these fixes.

1. Perform Some Quick and Easy Checks
Apply the following preliminary checks before moving on to the major fixes:
- Restart the Device Manager and your device to ensure it isn’t a temporary issue.
- Some laptops feature a shortcut for disabling the camera. If your laptop also has one, press the shortcut once to ensure that you haven’t disabled the camera app mistakenly.
- If any other apps are currently using your device’s camera, close them.
- If the Camera app is currently running in the background, close it from Task Manager.
Apply the remaining fixes if the above checks don’t help.
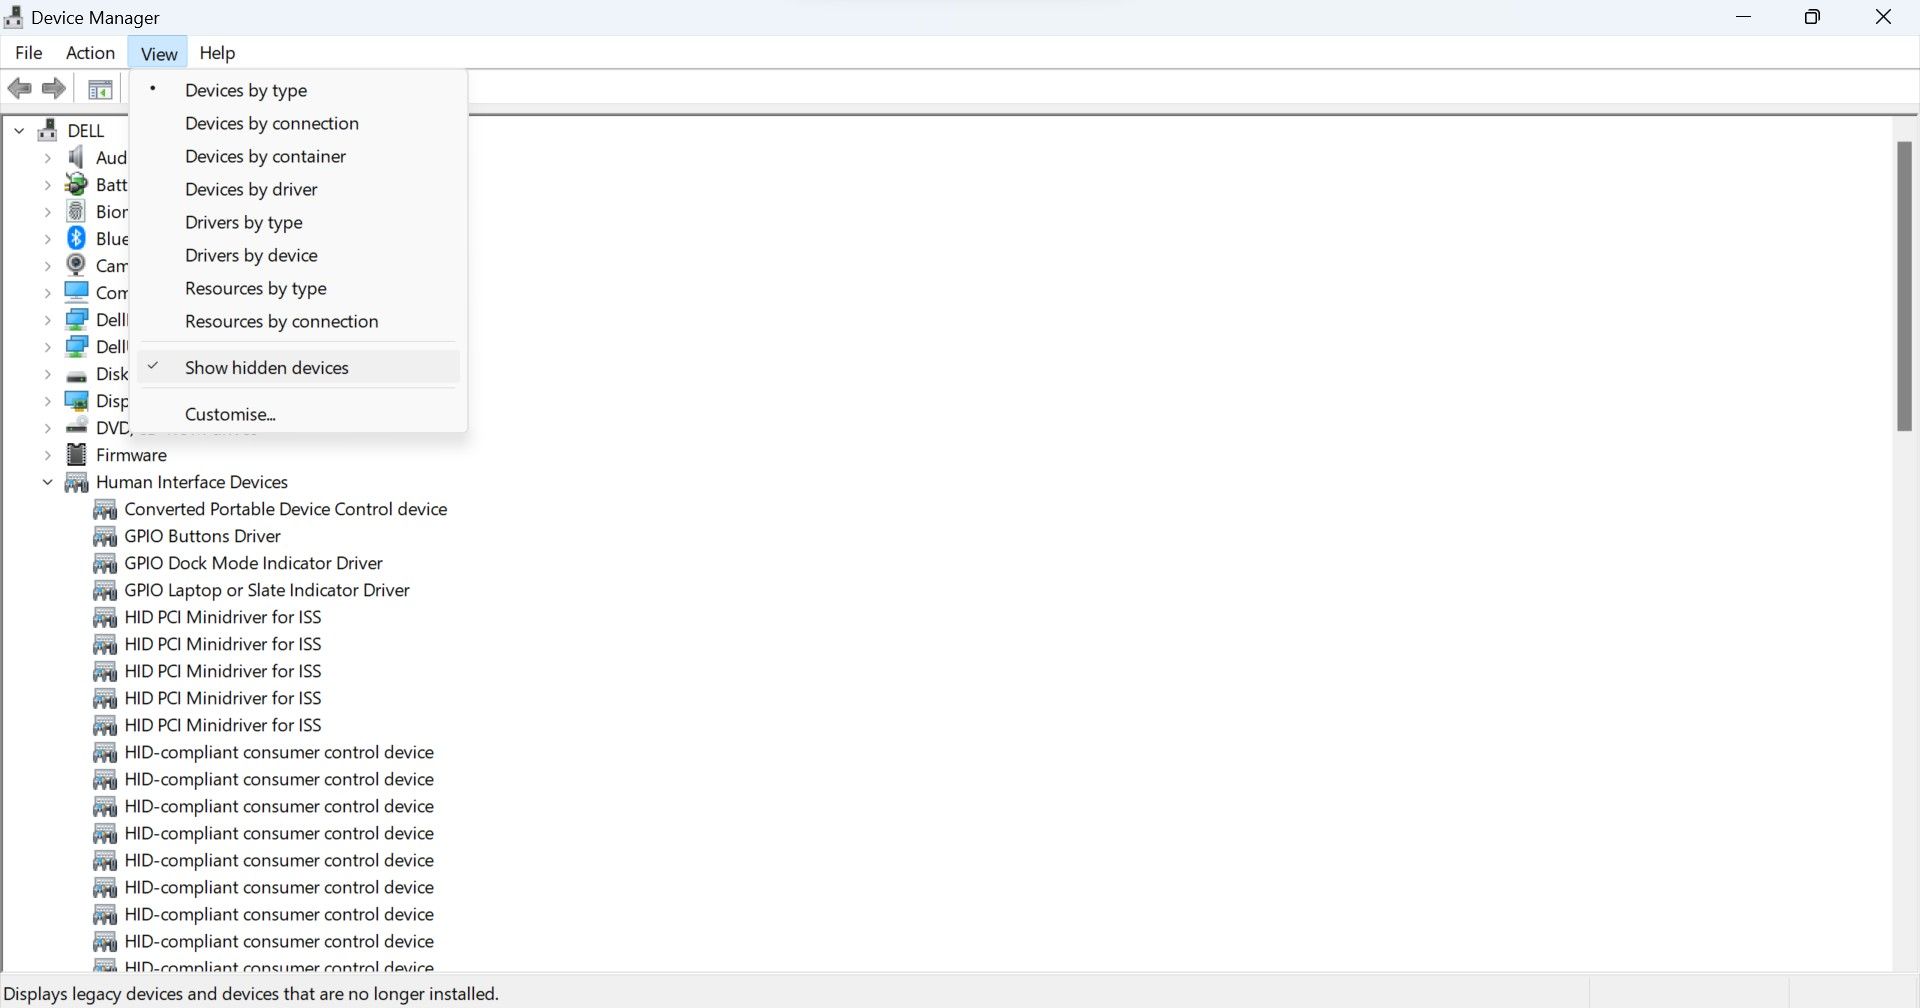
2. Ensure Camera Isn’t Hidden in the Device Manager
The Device Manager gives users an option to hide devices. Once you hide them, these devices disappear from the Device Manager. Therefore, if you don’t see the Camera device, it might have been hidden by mistake. To make sure that’s not the case or to unhide the device if it has been hidden, follow these steps:
- Type”Device Manager” in Windows Search and open theDevice Manager app.
- Go to theView tab.
- If you see a tick mark before theShow hidden devices option, then hidden devices are already displaying. If you don’t see this tick mark, click on this option, and hidden devices will appear.
3. Run the Camera Troubleshooter
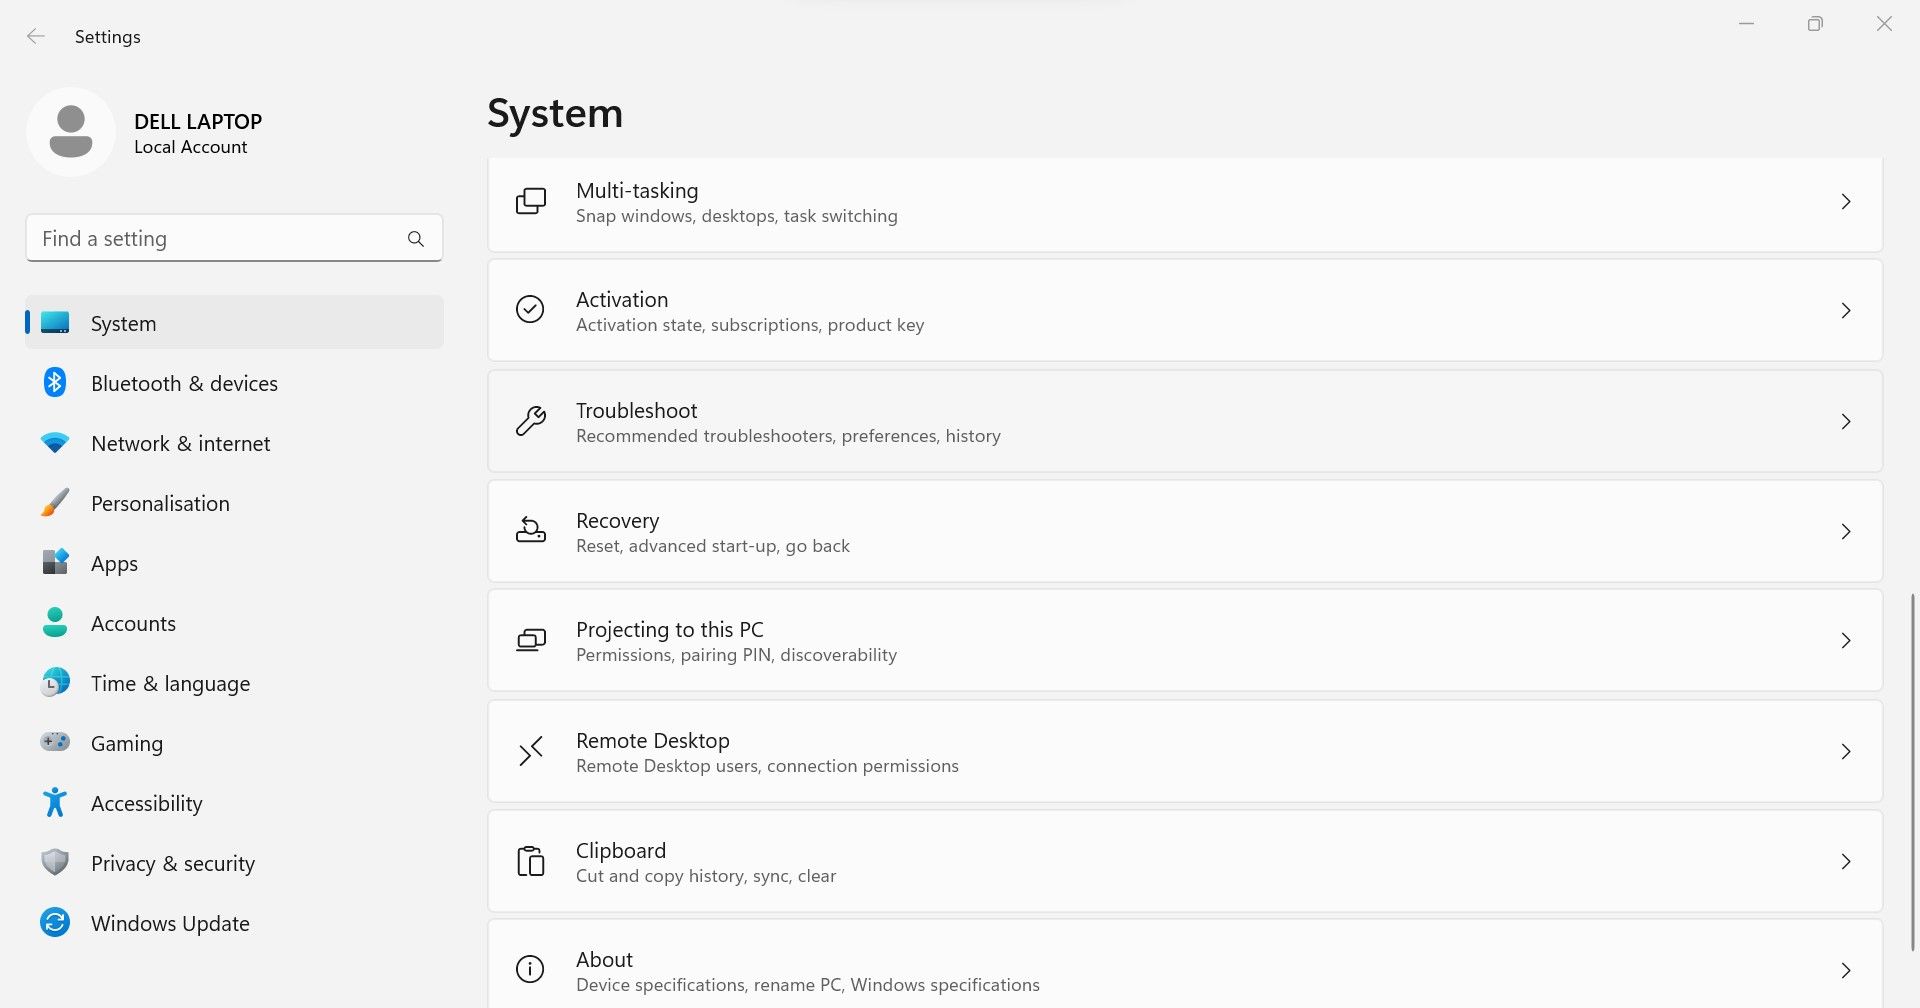
There is a built-in Camera troubleshooter on Windows that can help you identify and fix camera-related problems. Therefore, running the troubleshooter may also resolve this issue. Follow these steps to run it:
- Type”Settings” in Windows Search and open theSettings app.
- Go to theSystem tab in the left sidebar.
- In the right pane, clickTroubleshoot .
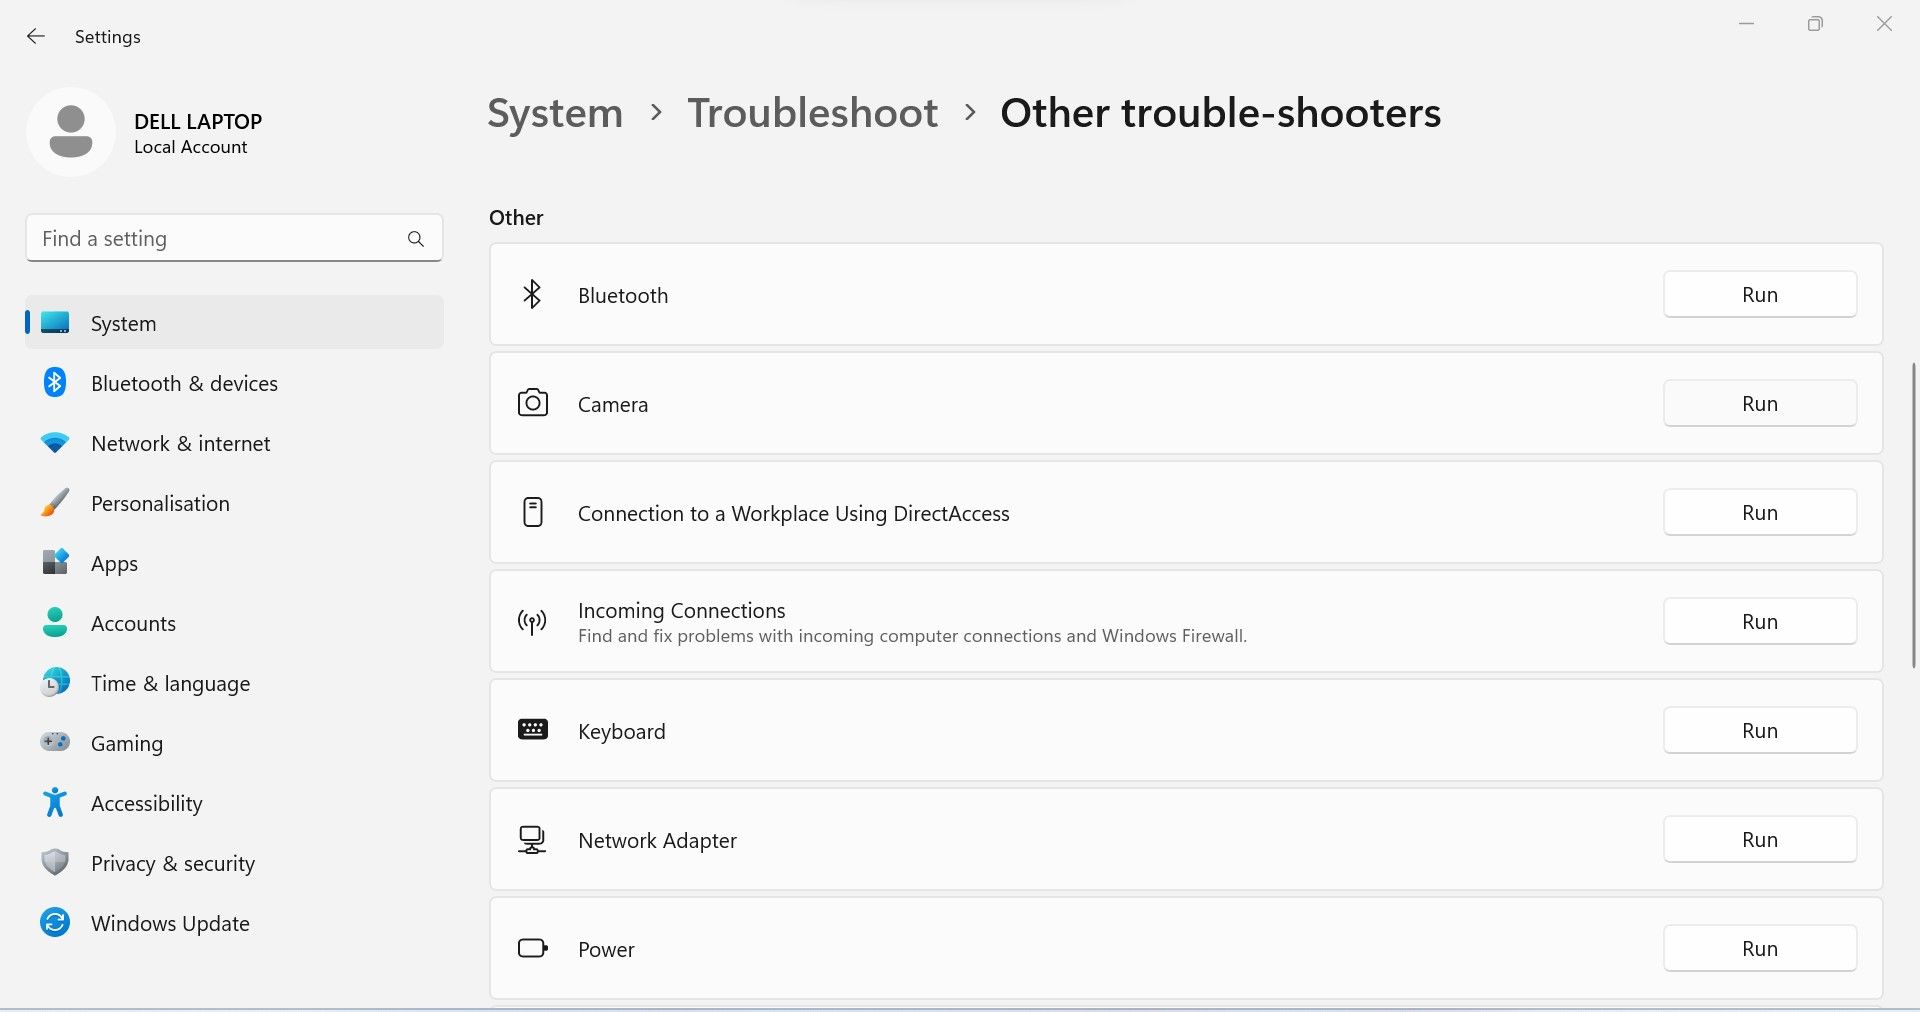
- Go toOther troubleshooters .
- Click theRun button next to theCamera troubleshooter.
Easy GIF Animator is a powerful animated GIF editor and the top tool for creating animated pictures, banners, buttons and GIF videos. You get extensive animation editing features, animation effects, unmatched image quality and optimization for the web. No other GIF animation software matches our features and ease of use, that’s why Easy GIF Animator is so popular.
 Easy GIF Animator is a powerful animated GIF editor and the top tool for creating animated pictures, banners, buttons and GIF videos. You get extensive animation editing features, animation effects, unmatched image quality and optimization for the web. No other GIF animation software matches our features and ease of use, that’s why Easy GIF Animator is so popular.
4. Run a Few Scans
Make sure corrupt system files are not causing the problem. To rule out this possibility, you need to run a few scans, such as SFC, DISM, and CHKDSK. If you have never performed these scans before, our guide on repairing corrupt files with Windows built-in tools explains how to run them. So, run these scans before moving on.

5. Download the Camera Drivers Manually
When a driver gets corrupt, or you mistakenly uninstall it, Windows is supposed to automatically reinstall it when you restart the computer. If the camera driver is not appearing in Device Manager after restarting the computer, you should manually install it.
To do that, go to your laptop manufacturer’s website, for instance,HP ,Lenovo ,Dell , etc., search for the latest camera driver, and download it. Once you have downloaded the driver, follow the on-screen instructions to install it, just like any other driver or program.
6. Let the Camera App Access Your Camera
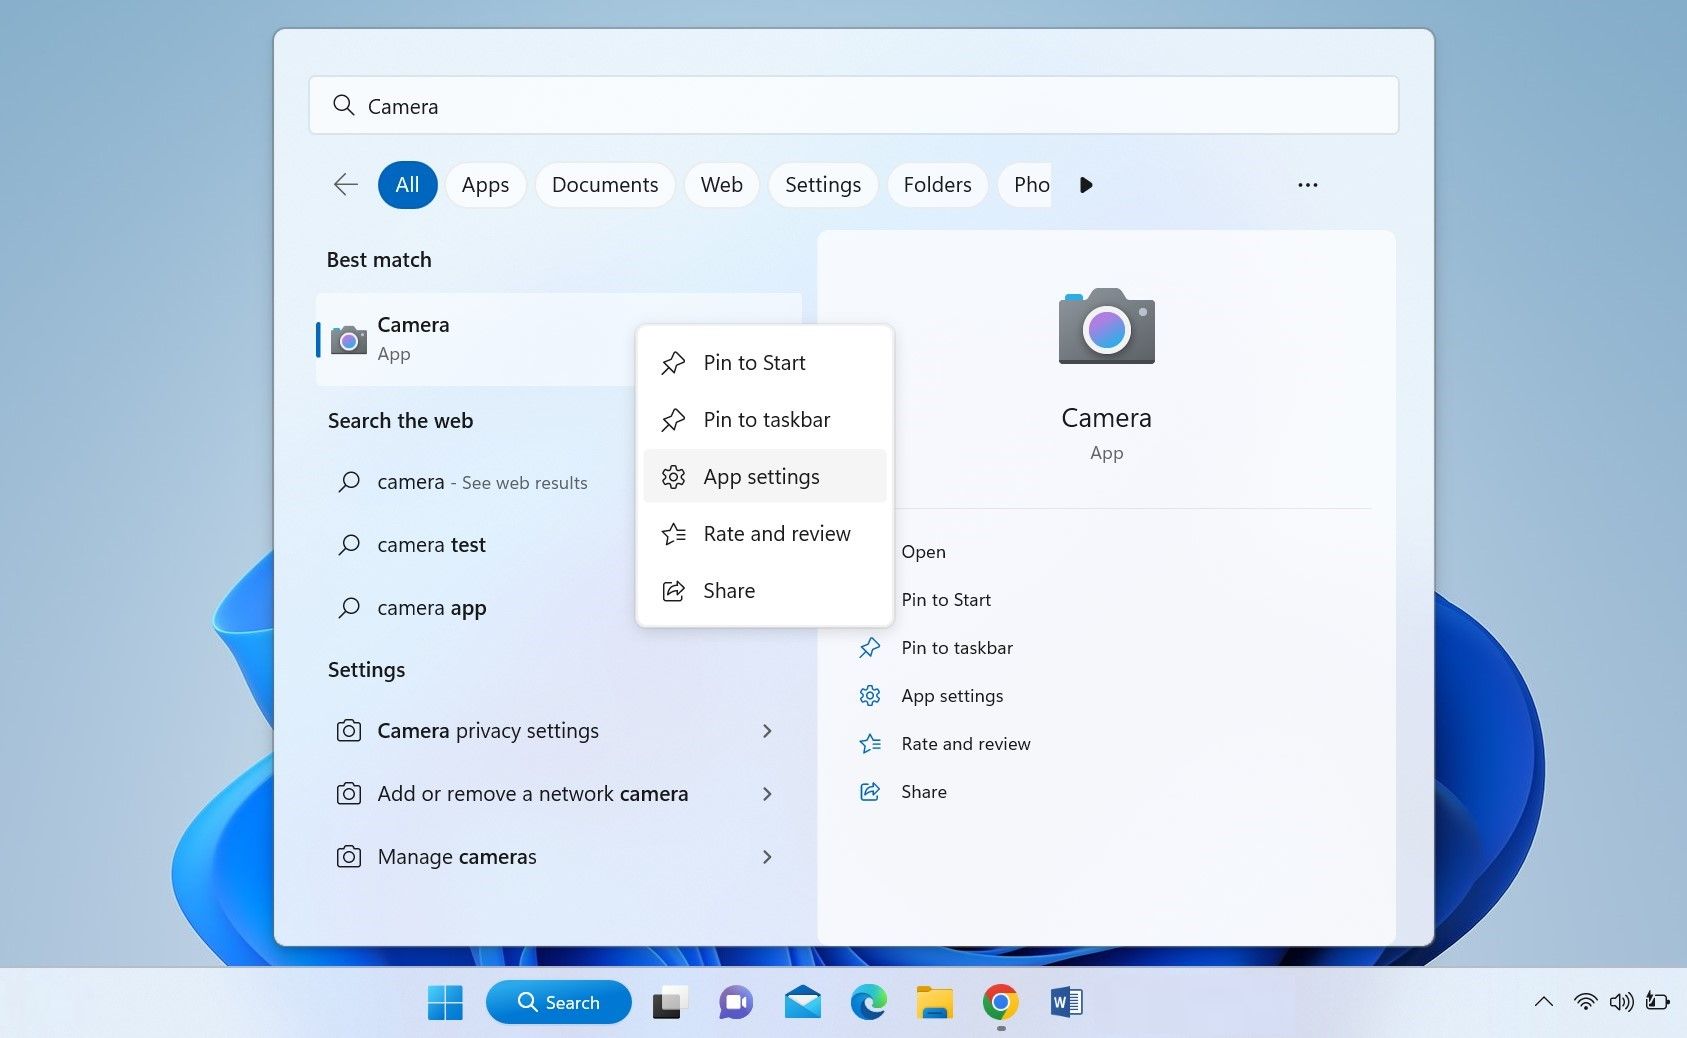
For the Camera app to function, it must have permission to access your device’s camera. If this permission is disabled, the camera application may not even launch, causing unexpected problems. To ensure permission restrictions aren’t causing this issue as well, ensure this permission is enabled.
Here are the steps to check:
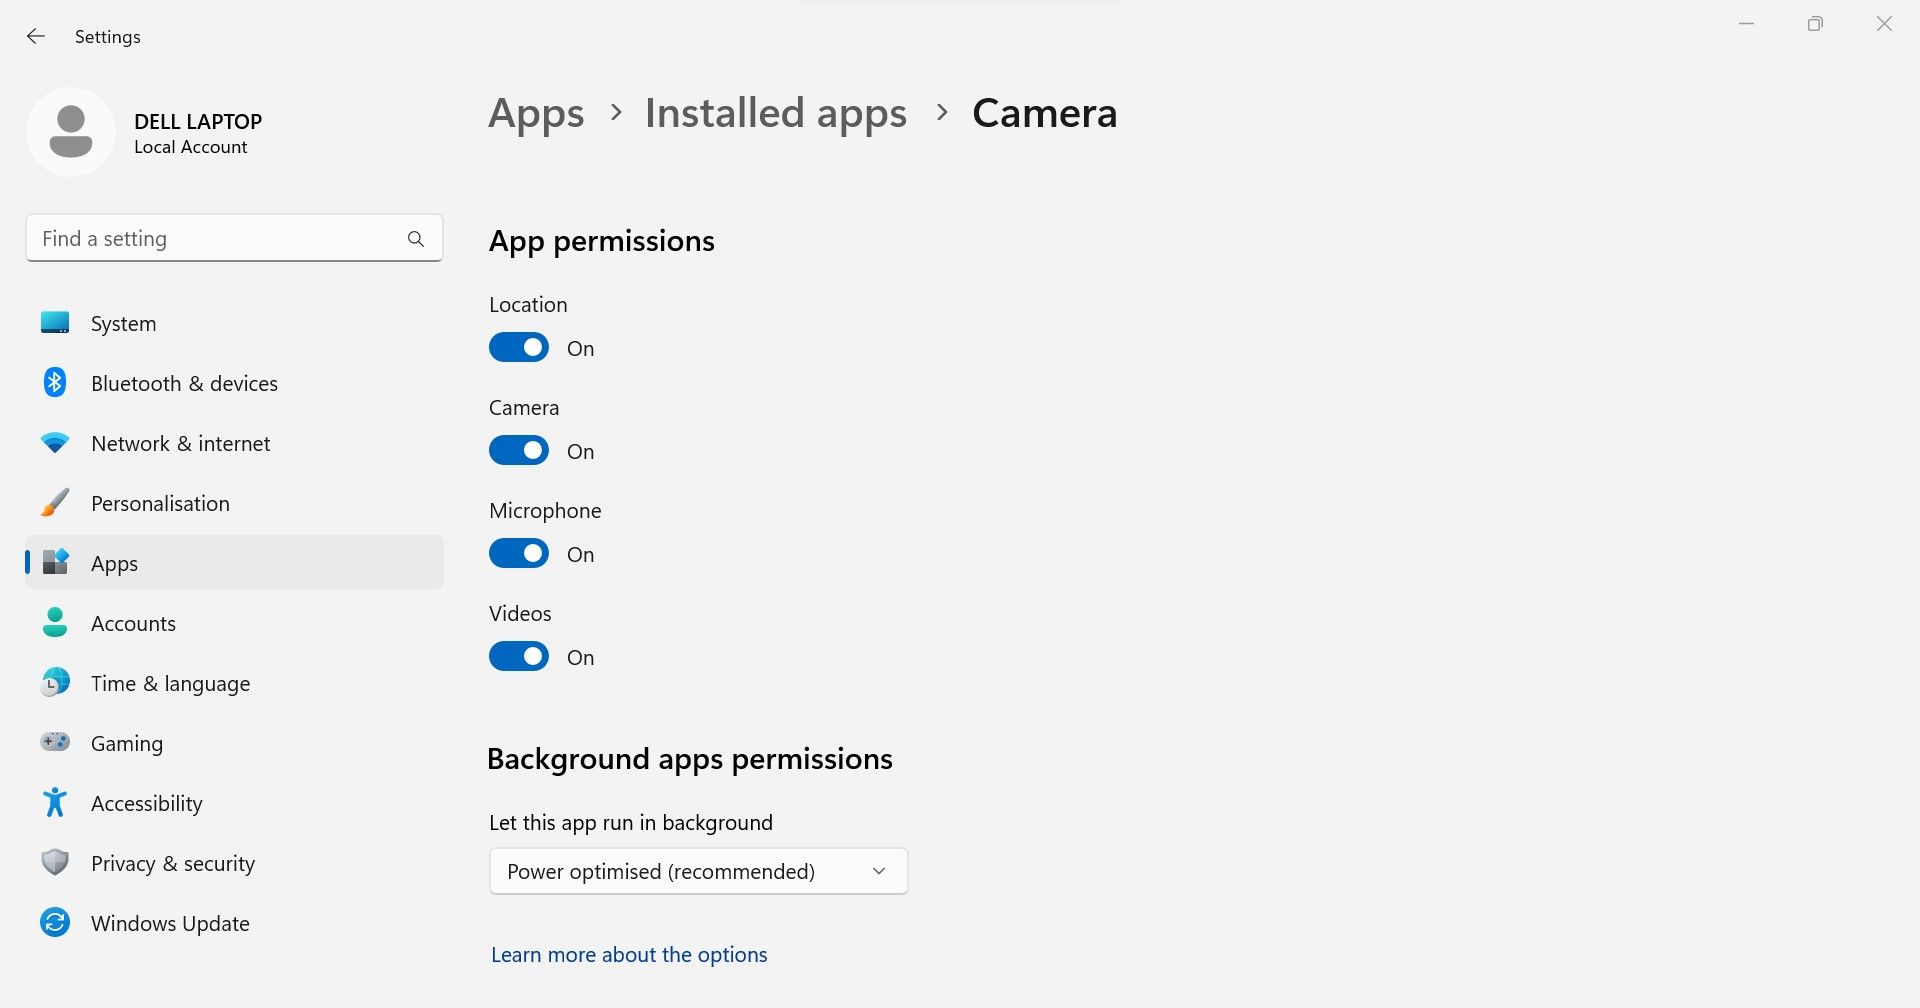
- Type**”Camera”** in Windows Search.
- Right-click on theCamera app and then selectApp settings.
- Make sure Camera access is enabled underApp permissions . If not, turn it on.
7. Reset the Camera App
If you’ve modified the settings for the camera app recently and are experiencing the issue under discussion afterward, reset the app. You won’t lose any data by resetting the camera app, but it will revert all customizations you’ve made. Therefore, you will need to customize the app from scratch.
Don’t know how to reset the camera app? Our article on how to reset any app on Windows 10 and Windows 11 explains how to do it.
8. Add the Camera Device in Device Manager
The Device Manager allows users to manually add devices that aren’t detected automatically by the system. So, in the next step, add the camera device to Device Manager via the Add Hardware wizard. This wizard lets you install the hardware either manually or automatically. Let’s go with the automatic option to keep things simple.
Follow these steps to search for and install the hardware automatically:
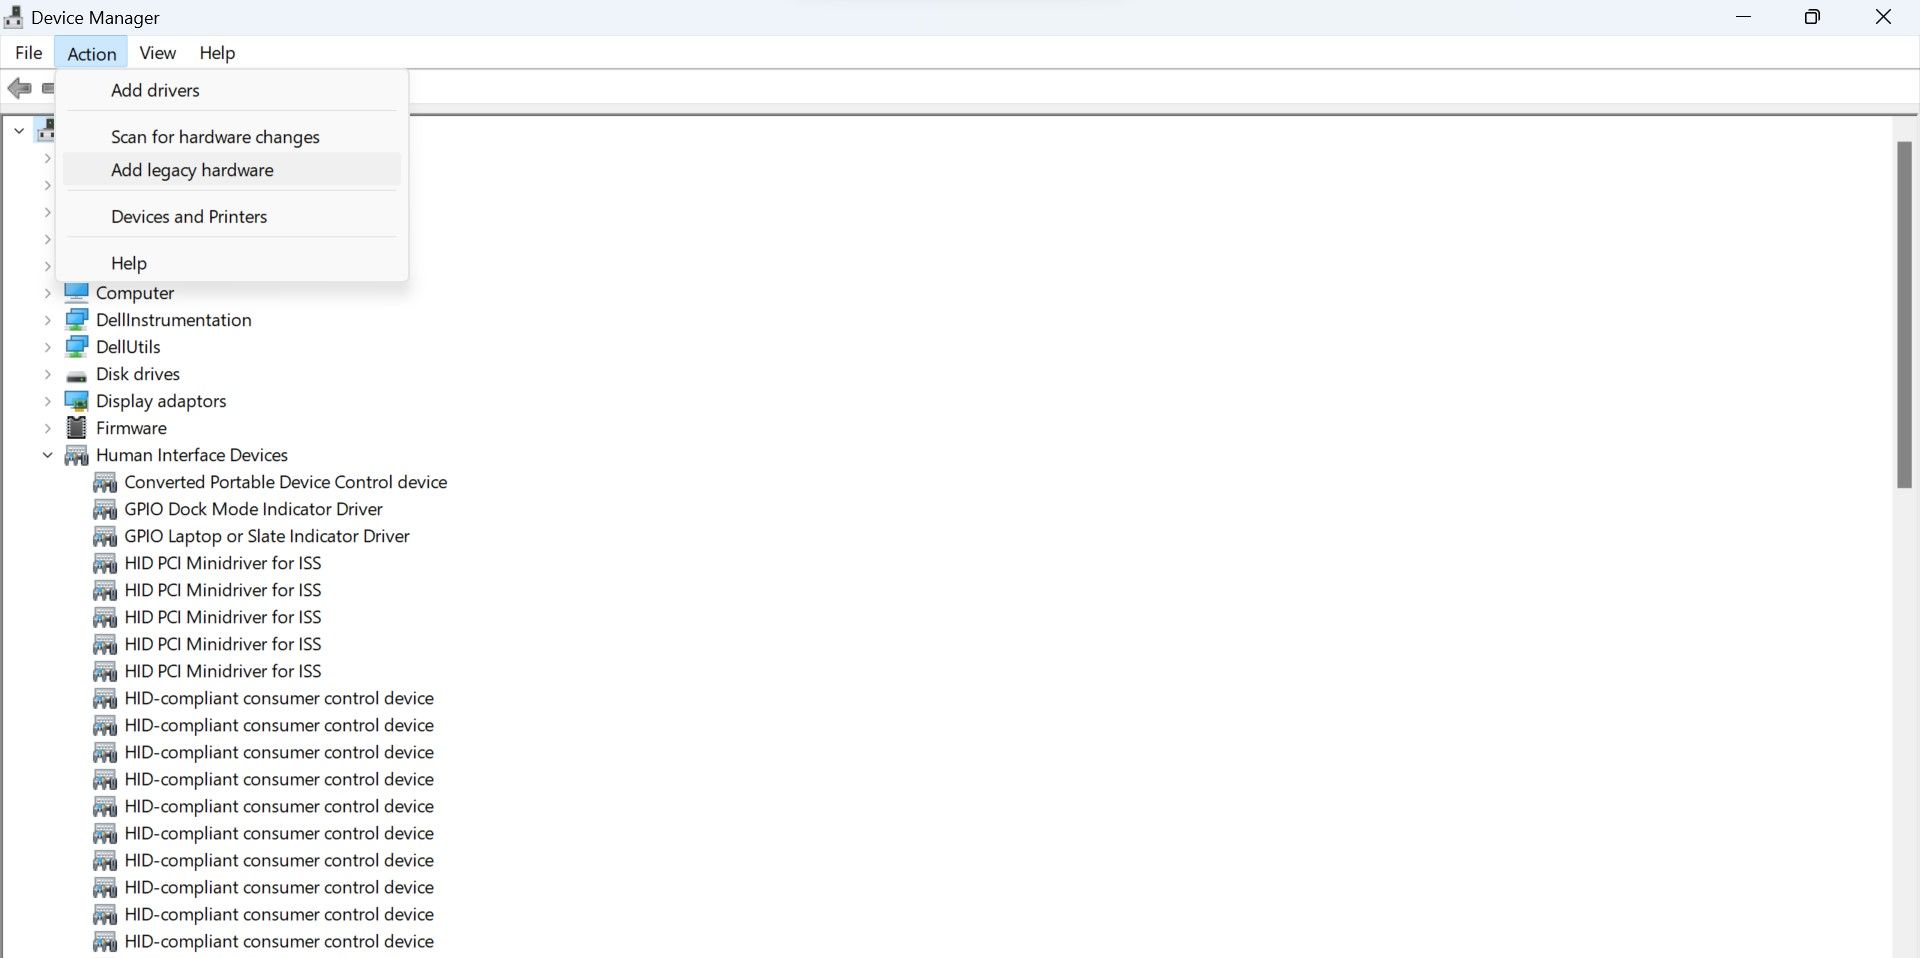
- Type**”Device Manager”** in Windows Search and open theDevice Manager app.
- Go to theAction tab and click onAdd legacy hardware .
- ClickNext .
- Select Search for and install the hardware automatically (Recommended) and clickNext .


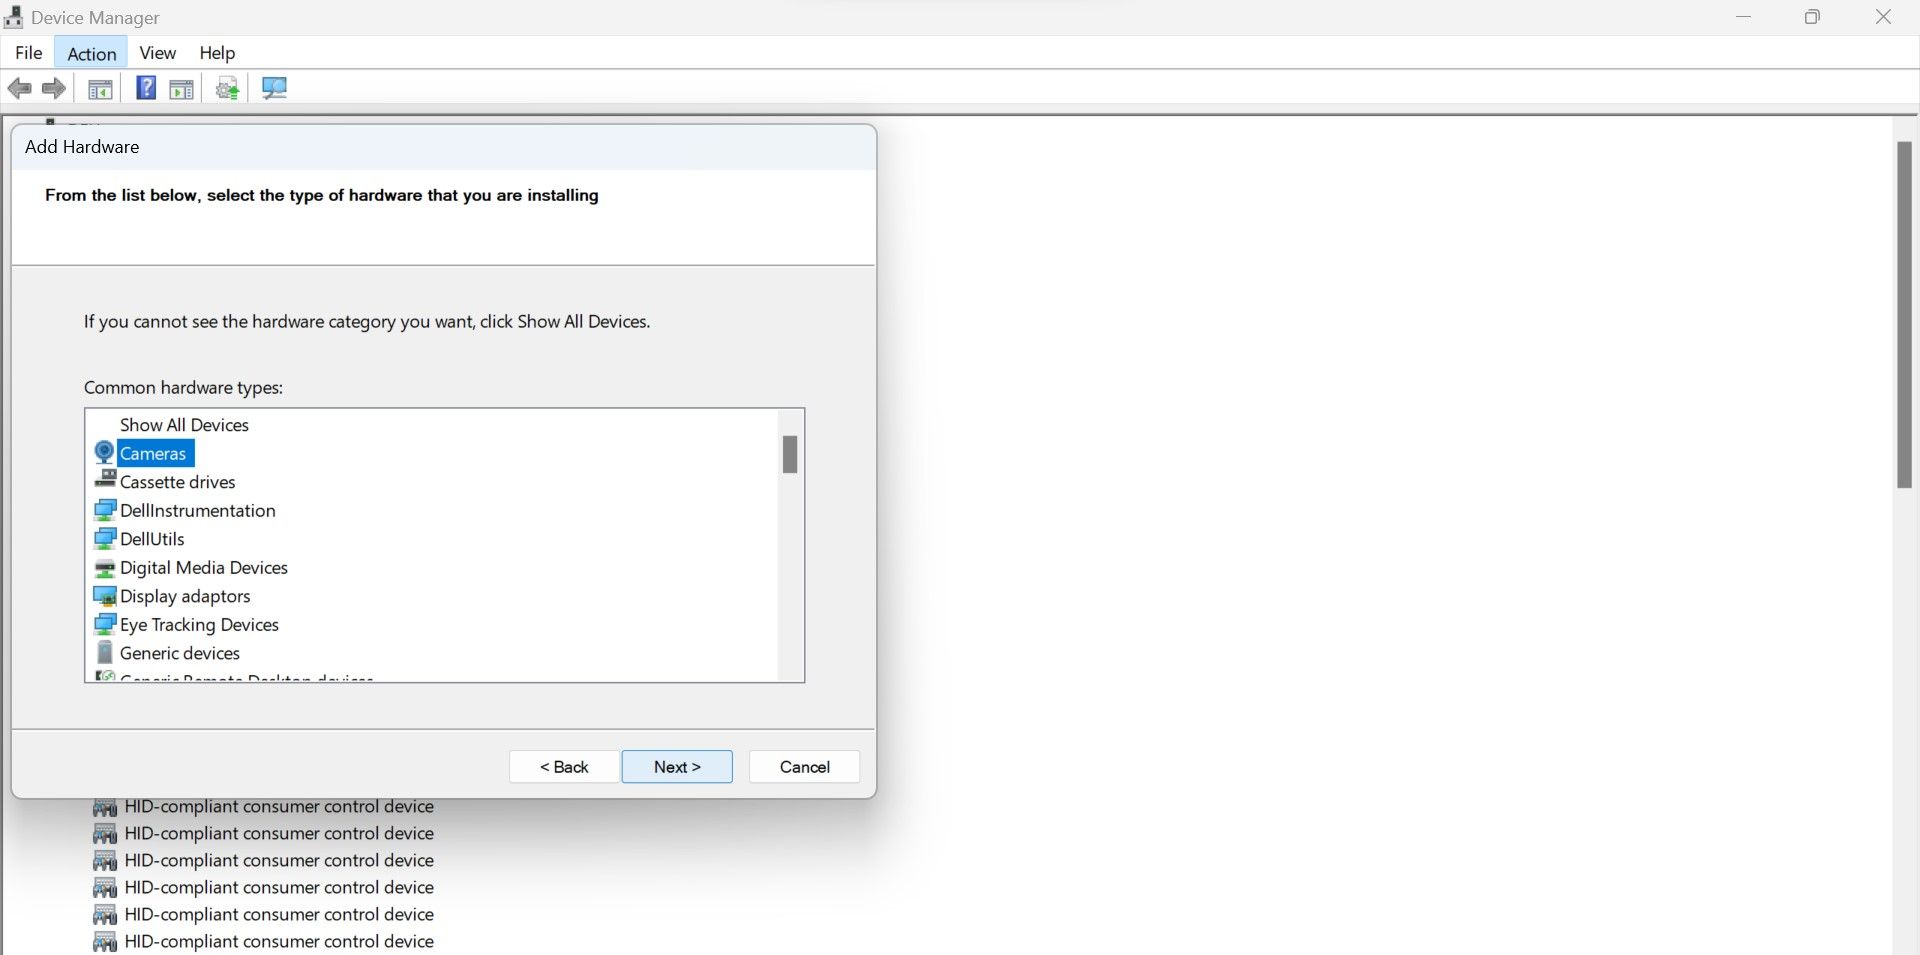
If the camera device fails to restore after running this automatic check, follow steps one to three again and select the second option; I nstall the hardware that I manually select from a list (Advanced) .

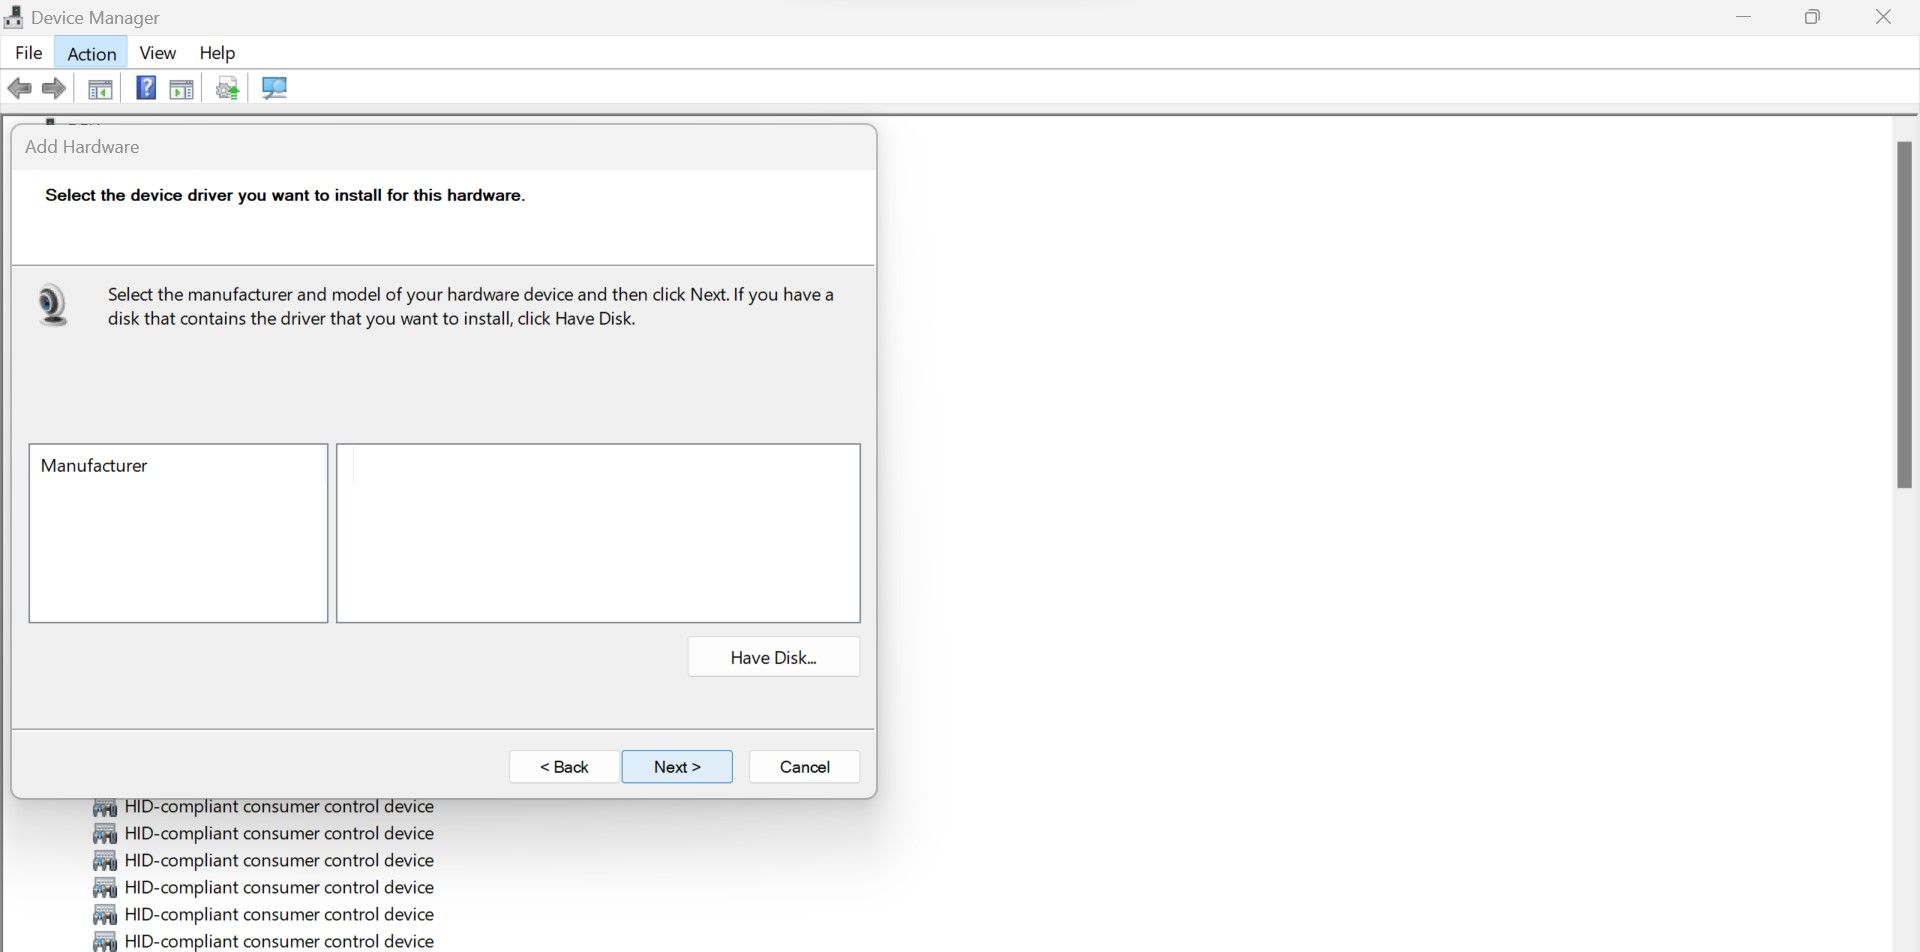
Then clickNext , and double-click onCamera from available hardware types.
If you can’t find your camera’s manufacturer or model number here, there might be a problem with your camera hardware.
9. Get Your Laptop Checked
If none of these fixes work and the camera device doesn’t appear in the Device Manager, there may be a hardware issue. So, you should take your laptop for a thorough inspection. If the device is still under warranty, you should have it checked by the manufacturer rather than a local shop.
 LYRX is an easy-to-use karaoke software with the professional features karaoke hosts need to perform with precision. LYRX is karaoke show hosting software that supports all standard karaoke file types as well as HD video formats, and it’s truly fun to use.
Restore the Camera Driver in the Device Manager
Having no camera driver available in Device Manager for troubleshooting camera issues can be irritating. Unless there is a hardware issue, you’ll be able to restore it using the above fixes. In the same way as Camera, other devices can also disappear from the Device Manager. If that happens, don’t panic, they can also be easily fixed.
- Title: Bring Forward Elusive Cameras in Device Management
- Author: David
- Created at : 2024-08-16 00:26:59
- Updated at : 2024-08-17 00:26:59
- Link: https://win11.techidaily.com/bring-forward-elusive-cameras-in-device-management/
- License: This work is licensed under CC BY-NC-SA 4.0.