
Avoiding Clutter: Mastering the Deletion of Drive Partitions in Win OS
Avoiding Clutter: Mastering the Deletion of Drive Partitions in Win OS
Your Windows computer provides several options for deleting unwanted drive partitions, whether you are looking to consolidate space, restructure data allocation, or simply start over. However, before you do that, make sure to backup or move any important data on the partition, as the process removes all the data on the drive.
This guide will show you how to delete a drive partition using the Settings app, Disk Management tool, Command Prompt, and PowerShell.
1. How to Delete a Drive Partition on Windows Using the Settings App
The Windows Settings app makes it easy to manage drive partitions and perform advanced storage-related tasks. It also provides the most straightforward way to delete a drive partition on Windows.To delete a drive partition via the Settings app:
- Press Win + I to open the Settings app.
- In the System tab, click on Storage.
- Expand Advanced storage settings and click Disks & volumes.
- Click the Properties button next to the drive you wish to delete.
- Under the Format section, click the Delete button.
- Select Delete volume to confirm.

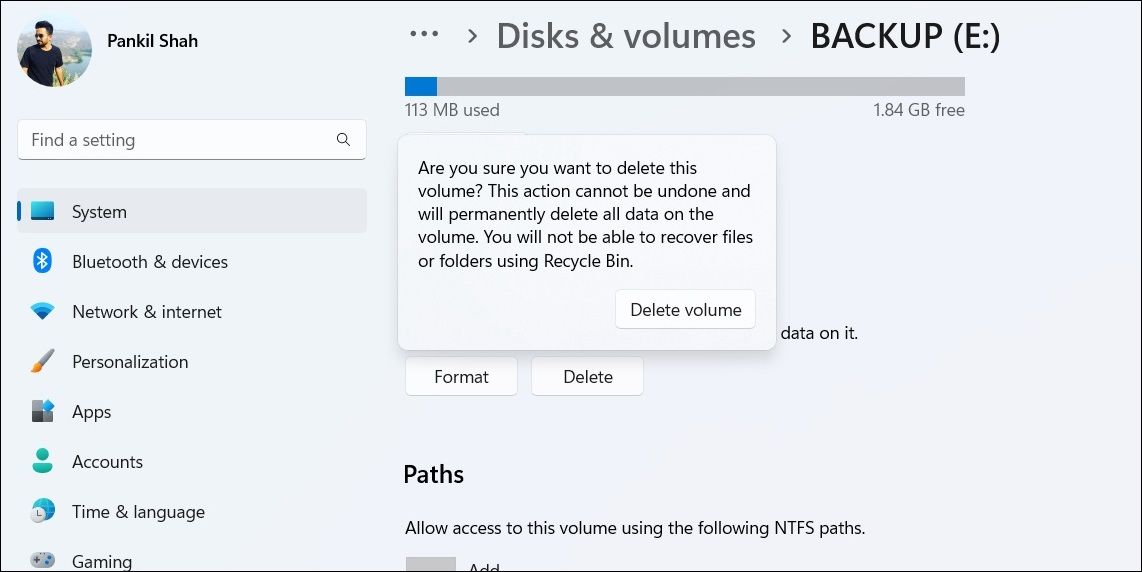
Once you complete the steps, the partition and everything on it will be gone.
2. How to Delete a Drive Partition on Windows Using the Disk Management Utility
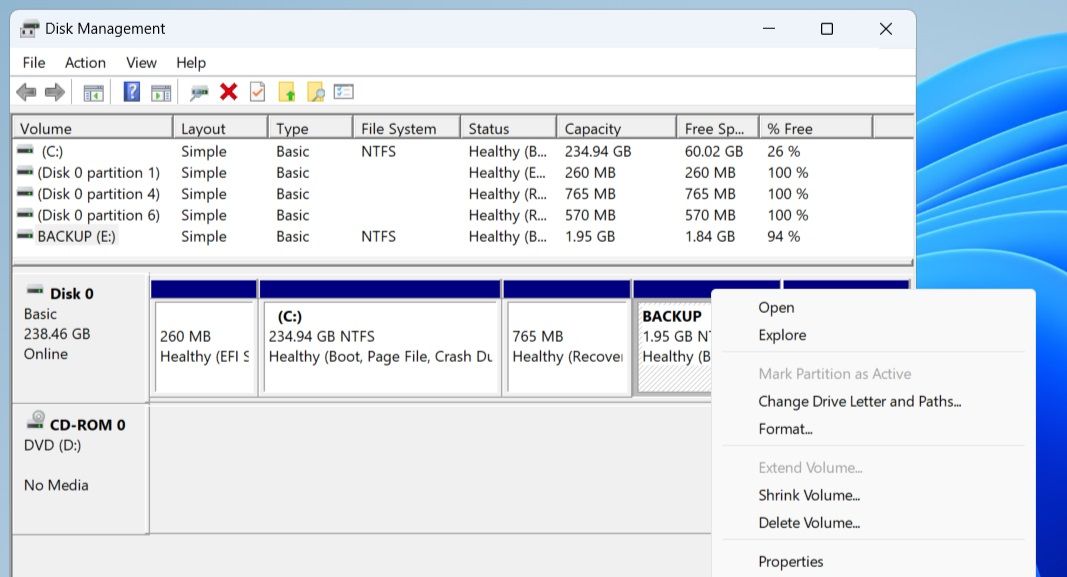
Another way to delete a drive partition on Windows is via the Disk Management tool. If you want to use that, follow these steps:
- Press Win + R to open the Run dialog box.
- Type diskmgmt.msc in the text field and press Enter.
- In the Disk Management window, right-click the unwanted partition and click the Delete Volume option.
- Select Yes to confirm.
KoolReport Pro is an advanced solution for creating data reports and dashboards in PHP. Equipped with all extended packages , KoolReport Pro is able to connect to various datasources, perform advanced data analysis, construct stunning charts and graphs and export your beautiful work to PDF, Excel, JPG or other formats. Plus, it includes powerful built-in reports such as pivot report and drill-down report which will save your time in building ones.
 KoolReport Pro is an advanced solution for creating data reports and dashboards in PHP. Equipped with all extended packages , KoolReport Pro is able to connect to various datasources, perform advanced data analysis, construct stunning charts and graphs and export your beautiful work to PDF, Excel, JPG or other formats. Plus, it includes powerful built-in reports such as pivot report and drill-down report which will save your time in building ones.
It will help you to write dynamic data reports easily, to construct intuitive dashboards or to build a whole business intelligence cockpit.
KoolReport Pro package goes with Full Source Code, Royal Free, ONE (1) Year Priority Support, ONE (1) Year Free Upgrade and 30-Days Money Back Guarantee.
Developer License allows Single Developer to create Unlimited Reports, deploy on Unlimited Servers and able deliver the work to Unlimited Clients.
Don’t want to get rid of a drive altogether? You can also choose to hide the drive on Windows using the Disk Management tool.
3. How to Delete a Drive Partition on Windows With the Command Prompt
Not a fan of GUI? No problem. Windows also lets you delete a drive partition using the Command Prompt. Here are the steps for the same.
- Right-click on the Start icon and select Terminal (Admin) from the menu that appears.
- Select Yes when the User Account Control (UAC) prompt shows up.
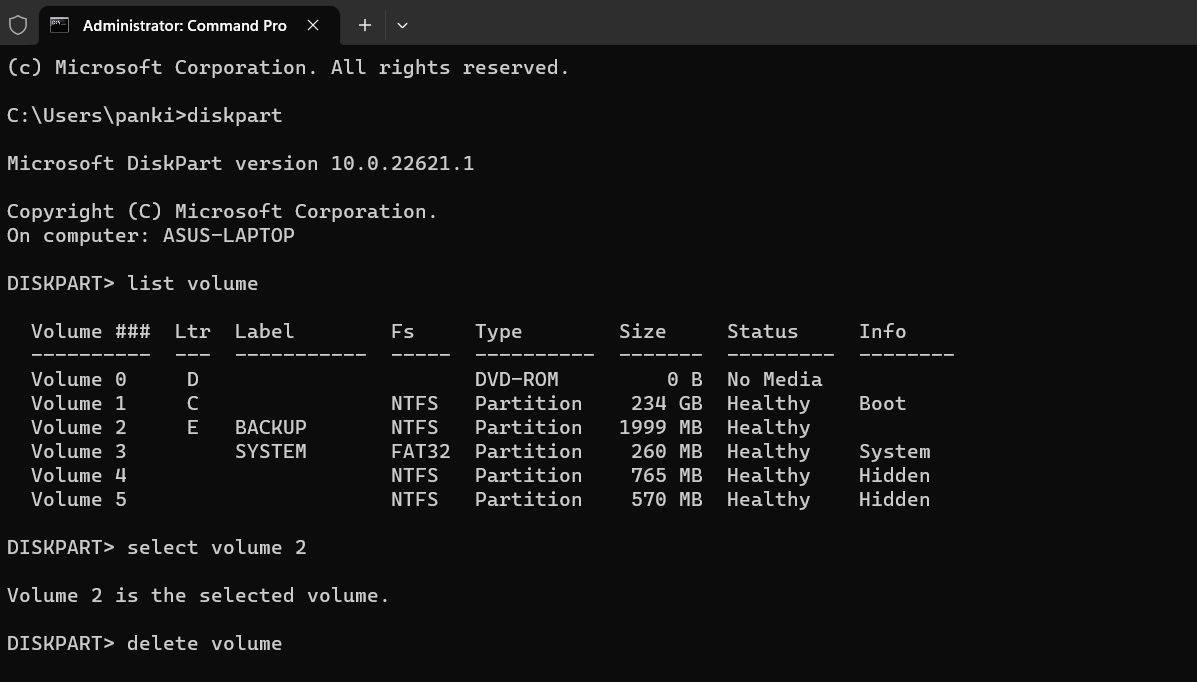
- In the console, run the following commands to view a list of drives connected to your system.
diskpart list volume - Note down the number associated with the drive you want to delete in the Volume column.
- Type the following command and press Enter to select the volume. Make sure you replace N in the command with the drive number noted earlier.
select volume N - Copy and paste the following command and press Enter to delete the partition.
delete volume

Enjoy working with the Command Prompt? If so, you will surely love our guide on customizing the Command Prompt on Windows .

4. How to Delete a Drive Partition on Windows via PowerShell
Windows PowerShell is another command-line tool that you can use to delete a disk partition. Here are the steps you need to follow.
- Press Win + S to open the search menu.
- Type in Windows PowerShell and select Run as administrator.
- Select Yes when the User Account Control (UAC) prompt appears to open PowerShell with admin rights .
- Run the following command to view a list of drives on your PC:
Get-volume - Note down the letter assigned to the drive you want to delete in the DriveLetter column.
- Copy and paste the following command to delete the partition. Replace X in the command with the actual drive letter noted in the previous step.
Remove-Partition -DriveLetter X - Type Y and press Enter to confirm.
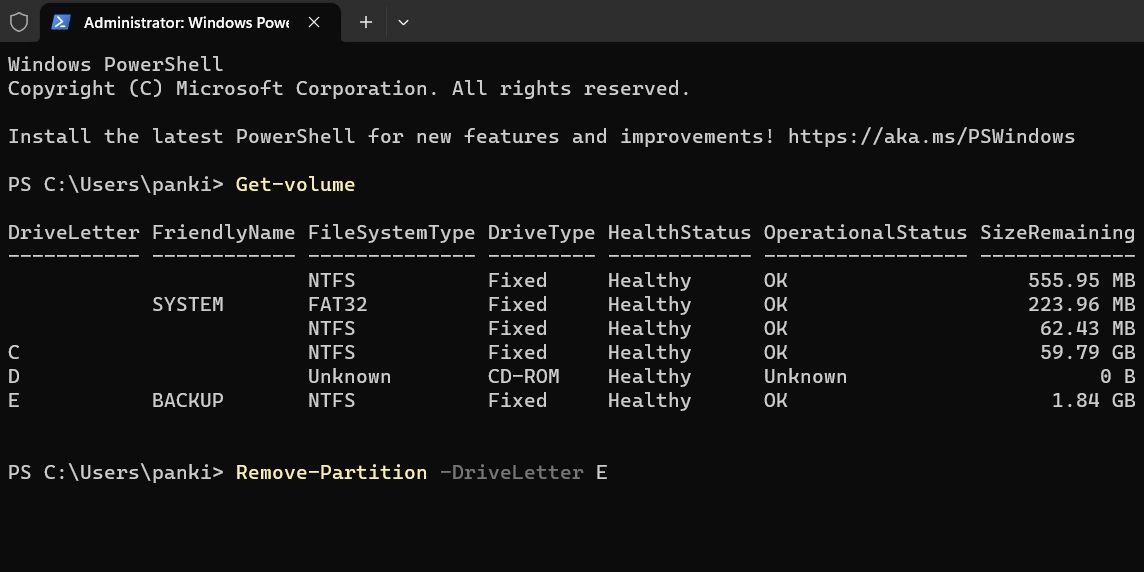
Once you run the above commands, PowerShell will delete the specified partition.

There Are Many Ways to Delete Drive Partitions on Windows
As we just saw, deleting a drive partition on Windows is a simple process, regardless of the method you use. Once you delete a partition, the space on that drive will be unallocated. You can then create a new partition on the empty space or use the space to expand an existing partition.
This guide will show you how to delete a drive partition using the Settings app, Disk Management tool, Command Prompt, and PowerShell.
- Title: Avoiding Clutter: Mastering the Deletion of Drive Partitions in Win OS
- Author: David
- Created at : 2024-08-15 23:17:17
- Updated at : 2024-08-16 23:17:17
- Link: https://win11.techidaily.com/avoiding-clutter-mastering-the-deletion-of-drive-partitions-in-win-os/
- License: This work is licensed under CC BY-NC-SA 4.0.