A Comprehensive Look at Windows iSCSI Initiator
A Comprehensive Look at Windows iSCSI Initiator
iSCSI (internet Small Computer Systems Interface) is an Internet Protocol-based storage networking tool that links data storage devices. It can be used to transmit data over local area networks (LANs), wide area networks (WANs), or the Internet.
Meanwhile, the Microsoft iSCSI Initiator is a tool that allows you to connect a host PC to an external iSCSI-based storage array. It manages the iSCSI sessions on your computer and the remote iSCSI target devices.
Let’s check out how you can configure this tool. From there, we’ll explore the different ways to access it.
How to Configure the iSCSI Initiator
Here are the steps for setting up the iSCSI Initiator:
- TypeiSCSI Initiator in the Start menu search bar and select theBest match .
- Navigate to theTargets tab.
- Type theIP address or theDNS name of the iSCSI target device in theTarget box.
- Click theQuick Connect button.
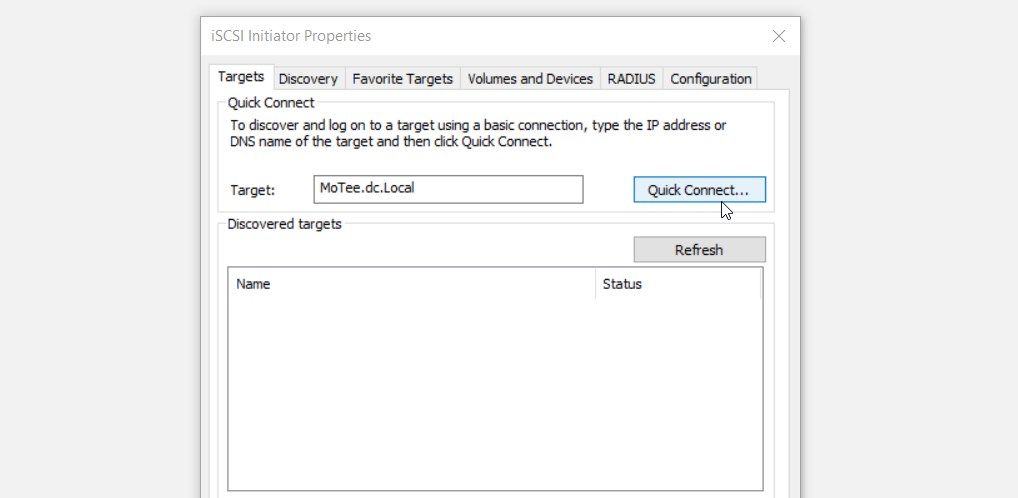
At this point, your iSCSI target device should be added to the “Discovered targets” box. Press theDone button to proceed.
Can’t find any iSCSI target devices? Navigate to theFavorite Targets tab and check if you can find something.
Otherwise, follow these steps:
- Navigate to theDiscovery tab.
- Click theRefresh button. This should allow your device to search for iSCSI targets on all the target portals.
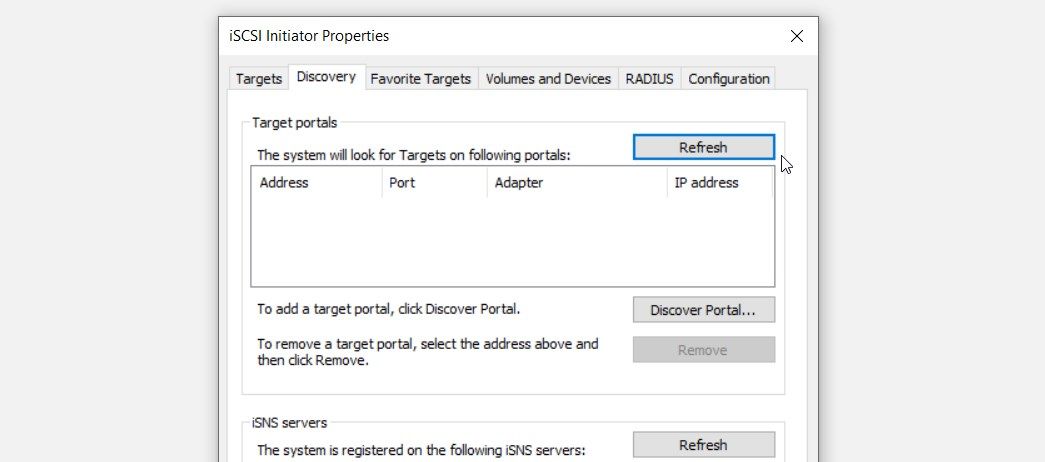
If you still can’t find iSCSI targets, click theDiscover Portal button and then add a target portal. From there, click theRefresh button again to search for the iSCSI target devices.
After adding your target device, you’ll be able to handle all iSCSI sessions from your PC using the iSCSI Initiator. To get started, simply explore all the options that appear on theVolumes and Devices tab and the other sections.
But then, what are the various ways to access the iSCSI Initiator? Let’s find out.
 Nero Burning ROM:
The ultimate burning program for all your needs!
1. Open the iSCSI Initiator Using the Run Command Dialog Box

 With Screensaver Wonder you can easily make a screensaver from your own pictures and video files. Create screensavers for your own computer or create standalone, self-installing screensavers for easy sharing with your friends. Together with its sister product Screensaver Factory, Screensaver Wonder is one of the most popular screensaver software products in the world, helping thousands of users decorate their computer screens quickly and easily.
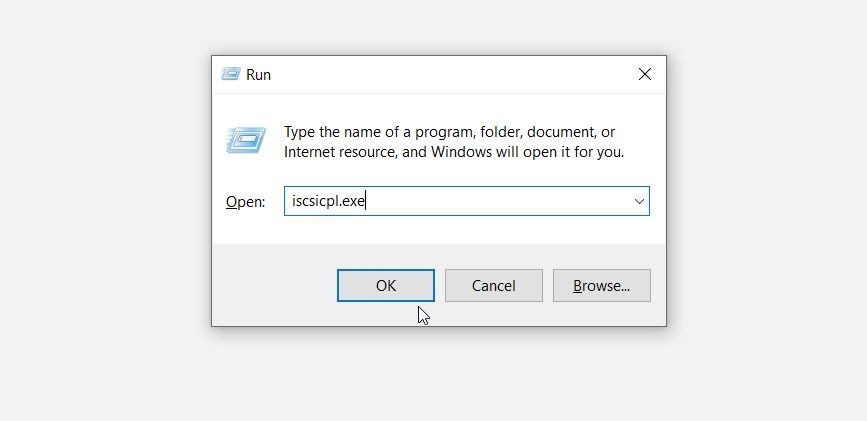
You’ve already discovered how to open the iSCSI Initiator with the Start menu search bar. Now, we’ll show you how to access this tool with the Run command dialog box.
What’s interesting is that you can also access your third-party programs using the Run command dialog box . But you’d need to tweak some Registry keys first.
Now, here’s how to open the iSCSI Initiator using the Run command dialog box:
- PressWin + R to open the Run command dialog box.
- Typeiscsicpl.exe and pressEnter to open the iSCSI Initiator.

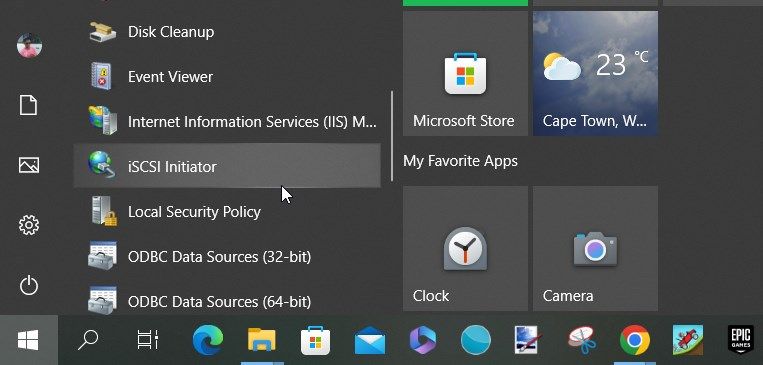
2. Open the iSCSI Initiator Using the Start Menu
The Start menu is another incredible tool that helps you easily access your apps. So, here’s how you can use it to access the iSCSI Initiator:
- Press theWindows key to access the Start menu. Alternatively, click theStart menu icon on the taskbar.
- Select theWindows Administrative Tools folder from the menu items on the left.
- Click theiSCSI Initiator option.
 ZoneAlarm Extreme Security NextGen
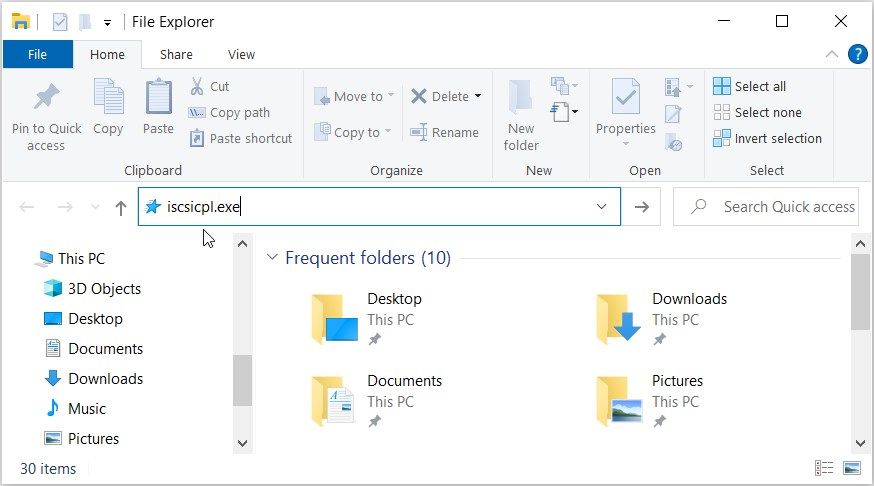
3. Open the iSCSI Initiator Using the File Explorer Address Bar
You probably know that you can locate your file and folder paths on the File Explorer address bar. In addition to that, this tool can also help you access almost any app on your device.
Here’s how to open the iSCSI Initiator using the File Explorer address bar:
- PressWin + E to open File Explorer.
- Typeiscsicpl.exe in File Explorer’s address bar and pressEnter .
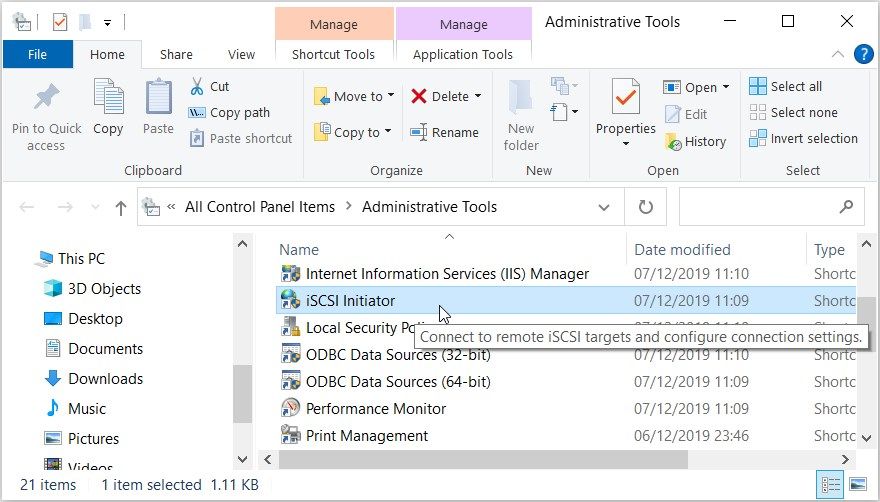
4. Open the iSCSI Initiator Using the Control Panel
Ever used the Control Panel before? It’s an awesome tool that helps you troubleshoot PC issues or configure some system settings.
But that’s not all! This tool can also help you access various programs on your Windows device.
Let’s check out how you can access the iSCSI Initiator using the Control Panel:
- TypeControl Panel in the Start menu search bar and select theBest match .
- Click theView by drop-down menu and select either theLarge icons orSmall icons option.
- SelectAdministrative Tools from the list.
- Click theiSCSI Initiator option.
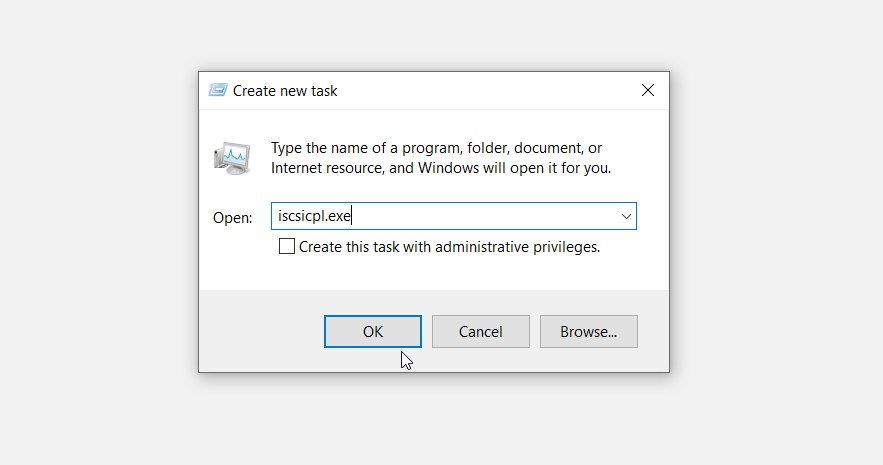
5. Open the iSCSI Initiator Using the Task Manager
You probably know that you can force close your Windows programs using the Task Manager. But besides that, this tool can also help you access your apps.
So, let’s explore how you can open the iSCSI Initiator using the Task Manager:
- TypeTask Manager in the Start menu search bar and select theBest match .
- Click theFile tab in the top-left corner.
- Select theRun new task option.
- Typeiscsicpl.exe in the search box and pressOK to open the iSCSI Initiator.
6. Open the iSCSI Initiator Using the Command Prompt or PowerShell
We’ll now check out how to access the iSCSI Initiator using the Command Prompt and PowerShell.
Let’s start with the Command Prompt:
- TypeCommand Prompt in the Start menu search bar.
- Right-click on theCommand Prompt result and selectRun as administrator .
- Type the following command and pressEnter to open the iSCSI Initiator:
iscsicpl.exe
Now, let’s discover how to open the iSCSI Initiator using PowerShell:
- TypeWindows PowerShell in the Start menu search bar.
- Right-click on theWindows PowerShell result and selectRun as administrator .
- Type the following command and pressEnter to open the iSCSI Initiator:
iscsicpl.exe

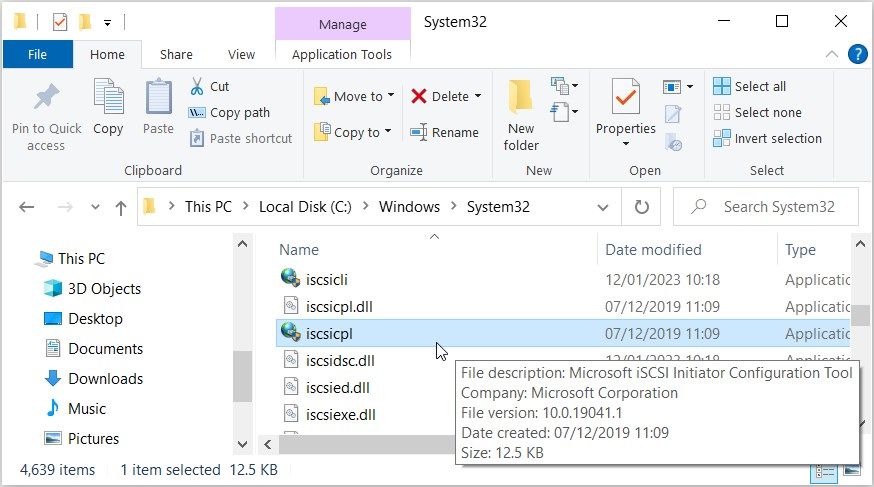
7. Search for the iSCSI Initiator in the System32 Directory

You can also access the iSCSI Initiator by double-clicking on the relevant option in the Windows System32 directory.
Here are the steps you need to follow:
- PressWin + E to open File Explorer.
- SelectThis PC on the left.
- Double-click on theLocal Disk (C:) option on the right.
- Open theWindows folder.
- Scroll down and open theSystem32 folder.
- Double-click on theiscsicpl option to open the iSCSI Initiator.
 vMix Pro - Software based live production. vMix Pro includes everything in vMix 4K plus 8 channels of Replay and 8 vMix Call
If you want to make your life much easier, simply pin the iSCSI Initiator to the taskbar. To do that, right-click on theiscsicpl option and selectPin to taskbar .
8. Use a Desktop Shortcut
The Windows desktop shortcuts help you access your apps with ease. So, let’s check out how to create a desktop shortcut for the iSCSI Initiator:
- PressWin + D to access the Windows desktop. Alternatively, check out the various ways to access the Windows desktop .
- When you’re on the desktop, right-click on a blank space and selectNew > Shortcut .
- Type**%windir%\system32\iscsicpl.exe** in the location box.
- PressNext to continue.
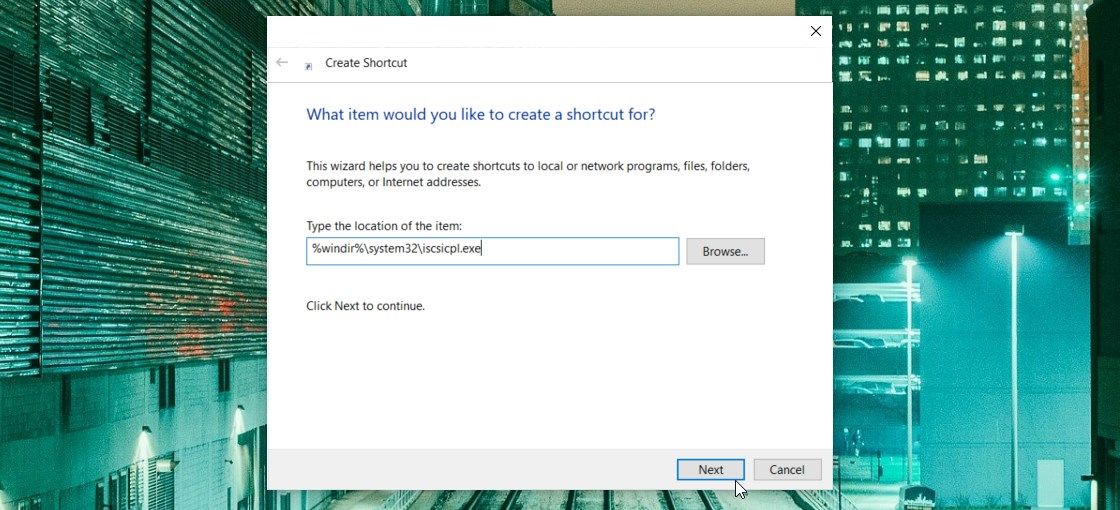
Type iSCSI Initiator in theName box and then press theFinish button. From there, you should easily access the tool using your desktop shortcut.
Easily Manage Your iSCSI Sessions With the iSCSI Initiator
Wondering how you can connect your Windows device to external iSCSI-based storage devices? The iSCSI Initiator is all you need!
If you want to easily access this tool, check out any of the methods in this article. And if you want to explore other ways to connect to a remote PC, then check out the Windows Remote Desktop Services tool.
- Title: A Comprehensive Look at Windows iSCSI Initiator
- Author: David
- Created at : 2024-08-15 23:25:03
- Updated at : 2024-08-16 23:25:03
- Link: https://win11.techidaily.com/a-comprehensive-look-at-windows-iscsi-initiator/
- License: This work is licensed under CC BY-NC-SA 4.0.