3 Ways to Enable Compact View in File Explorer on Windows 11

3 Ways to Enable Compact View in File Explorer on Windows 11
Windows 11 has introduced many new features to its File Explorer, one of which is the Compact View. This feature is primarily for users who preferred the previous File Explorer interface, which had less space between items.
So, we’ll share three ways you can enable the compact view in File Explorer on Windows 11.
1. Enable Compact View in File Explorer Using the Command Bar
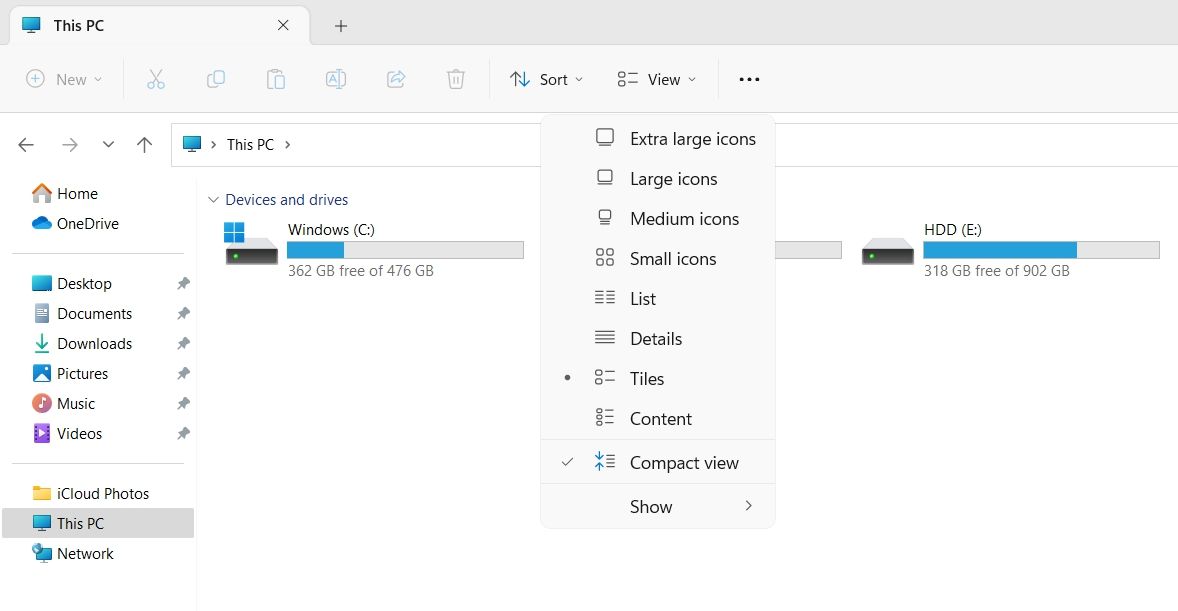
The easiest way to enable or disable the compact view in File Explorer is to use the command bar. Here’s what you need to do:
- Open the File Explorer and click the View option in the top bar.
- Choose the Compact view option to enable it.

That’s it. You might need to restart your computer for the changes to take effect.
2. Enable Compact View in File Explorer Using Folder Options
If the compact view option is missing in the command bar, you can use Folder options to get the work done. There are multiple ways to open the Folder option , but the quickest is to use the Run dialog box.
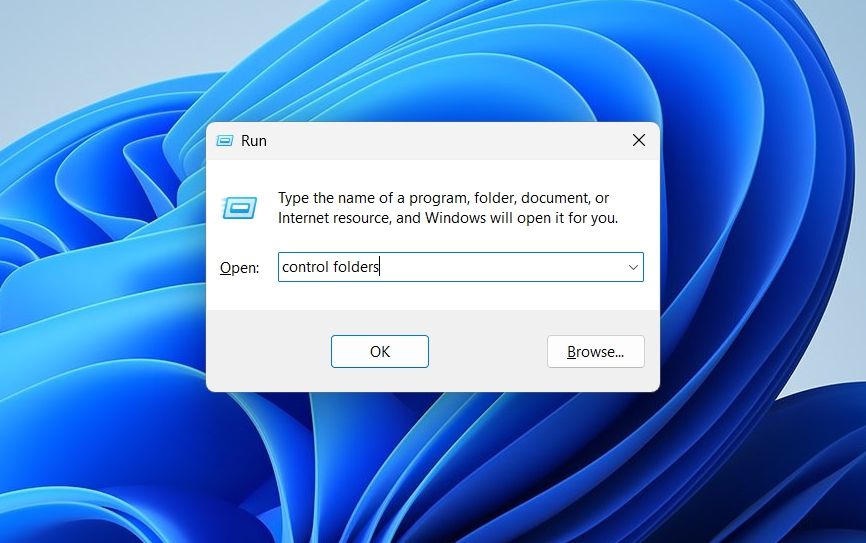
Open the Run dialog box by pressing the Win + R hotkeys, type control folders, and press Enter to open the Folder option.
Alternatively, in the Run dialog box, you can type
rundll32.exe shell32.dll,Options_RunDLL 0
and click OK to launch the Folder option.

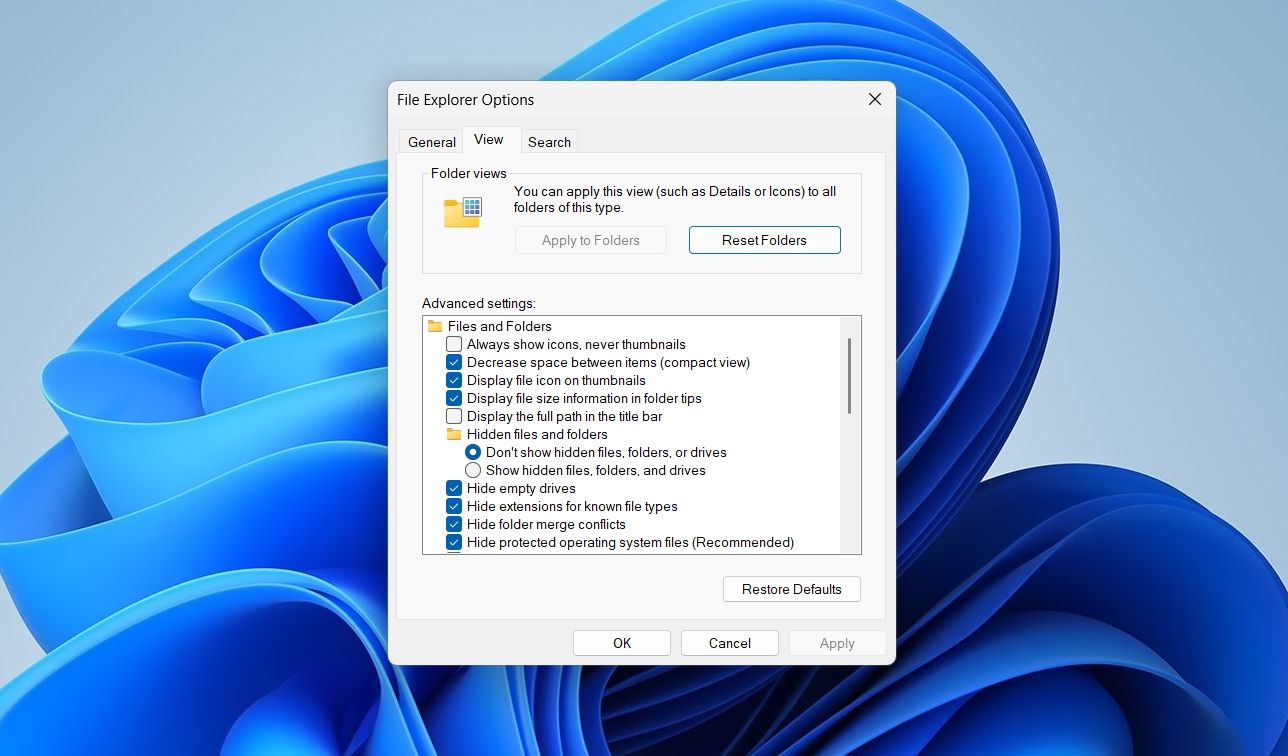
In the Folder option, switch to the View tab and check the Decrease space between item (compact view) box. Then, click Apply > OK to save the changes.

With that, you should have less space between your files in File Explorer.
3. Enable Compact View in File Explorer Using the Registry Editor

Registry files on your system contain important settings for Windows. If you’re an advanced Windows user, you can enable the compact view in File Explorer using the Registry Editor.
Note that editing the registry is risky. So, before getting into the below steps, make sure to back up your registry files or create a restore point .
- Press the Win + S hotkeys to open the search menu.
- Type regedit in the box and choose the Run as administrator option.
- Click Yes to the UAC that appears.
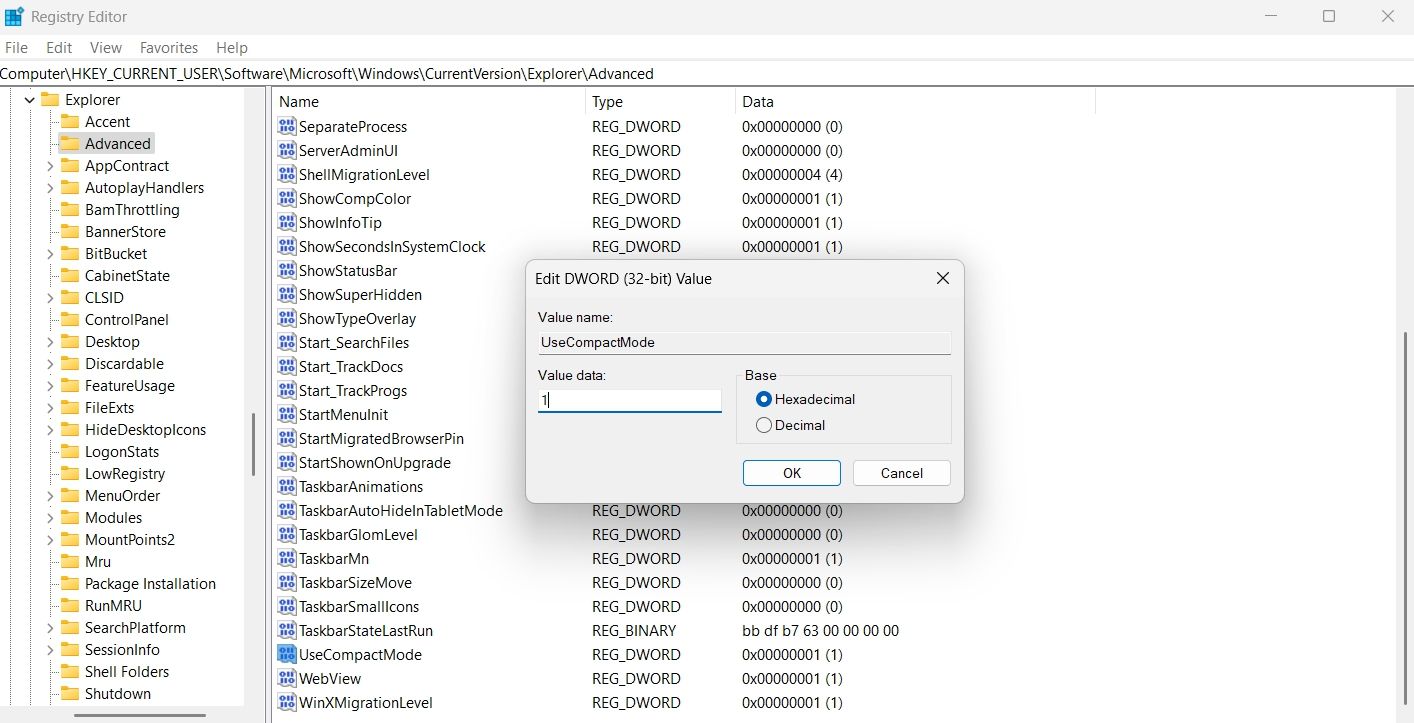
- In the Registry Editor, navigate to the following location:
HKEY_CURRENT_USER\Software\Microsoft\Windows\CurrentVersion\Explorer\Advanced - Search for and double-click on the UseCompactMode entry in the right pane.
- Type 1 in Value data and click OK. This will enable the Compact View. To disable, type 0 in the Value data and click OK.
Change the File Explorer Look Anytime
The new revamped File Explorer is good, but many users still prefer the old layout with less padding. If you want to remove extra spacing between items in File Explorer, you can enable the compact view option using either of the above methods.
Meanwhile, you might be interested in adding Google Drive to File Explorer.
- Title: 3 Ways to Enable Compact View in File Explorer on Windows 11
- Author: David
- Created at : 2024-08-15 23:27:08
- Updated at : 2024-08-16 23:27:08
- Link: https://win11.techidaily.com/3-ways-to-enable-compact-view-in-file-explorer-on-windows-11/
- License: This work is licensed under CC BY-NC-SA 4.0.

 With Screensaver Wonder you can easily make a screensaver from your own pictures and video files. Create screensavers for your own computer or create standalone, self-installing screensavers for easy sharing with your friends. Together with its sister product Screensaver Factory, Screensaver Wonder is one of the most popular screensaver software products in the world, helping thousands of users decorate their computer screens quickly and easily.